

I’m going to kick off saying that I’m really proud of myself. I’m not proud that I made beautiful set with a desk and a chair, but that I actually completed a project right before the start of our 2018 Fall wedding season.
This time last year we broke ground on our new house. We thought we were crazy. We decided to sign our name to a house where Patrick’s parents live, take over the mortgage and claim a place that would be “home” to us for years to come. When we were designing what it would look like, inside and out, what color the living room and bathrooms would be, what fixtures would hang from the ceiling, I knew I wanted to really nice and inviting space. A place where family and friends are always welcome and strangers would walk through and feel a sense of belonging in a home away from home. But also a place to share where we’ve been and where we are going.
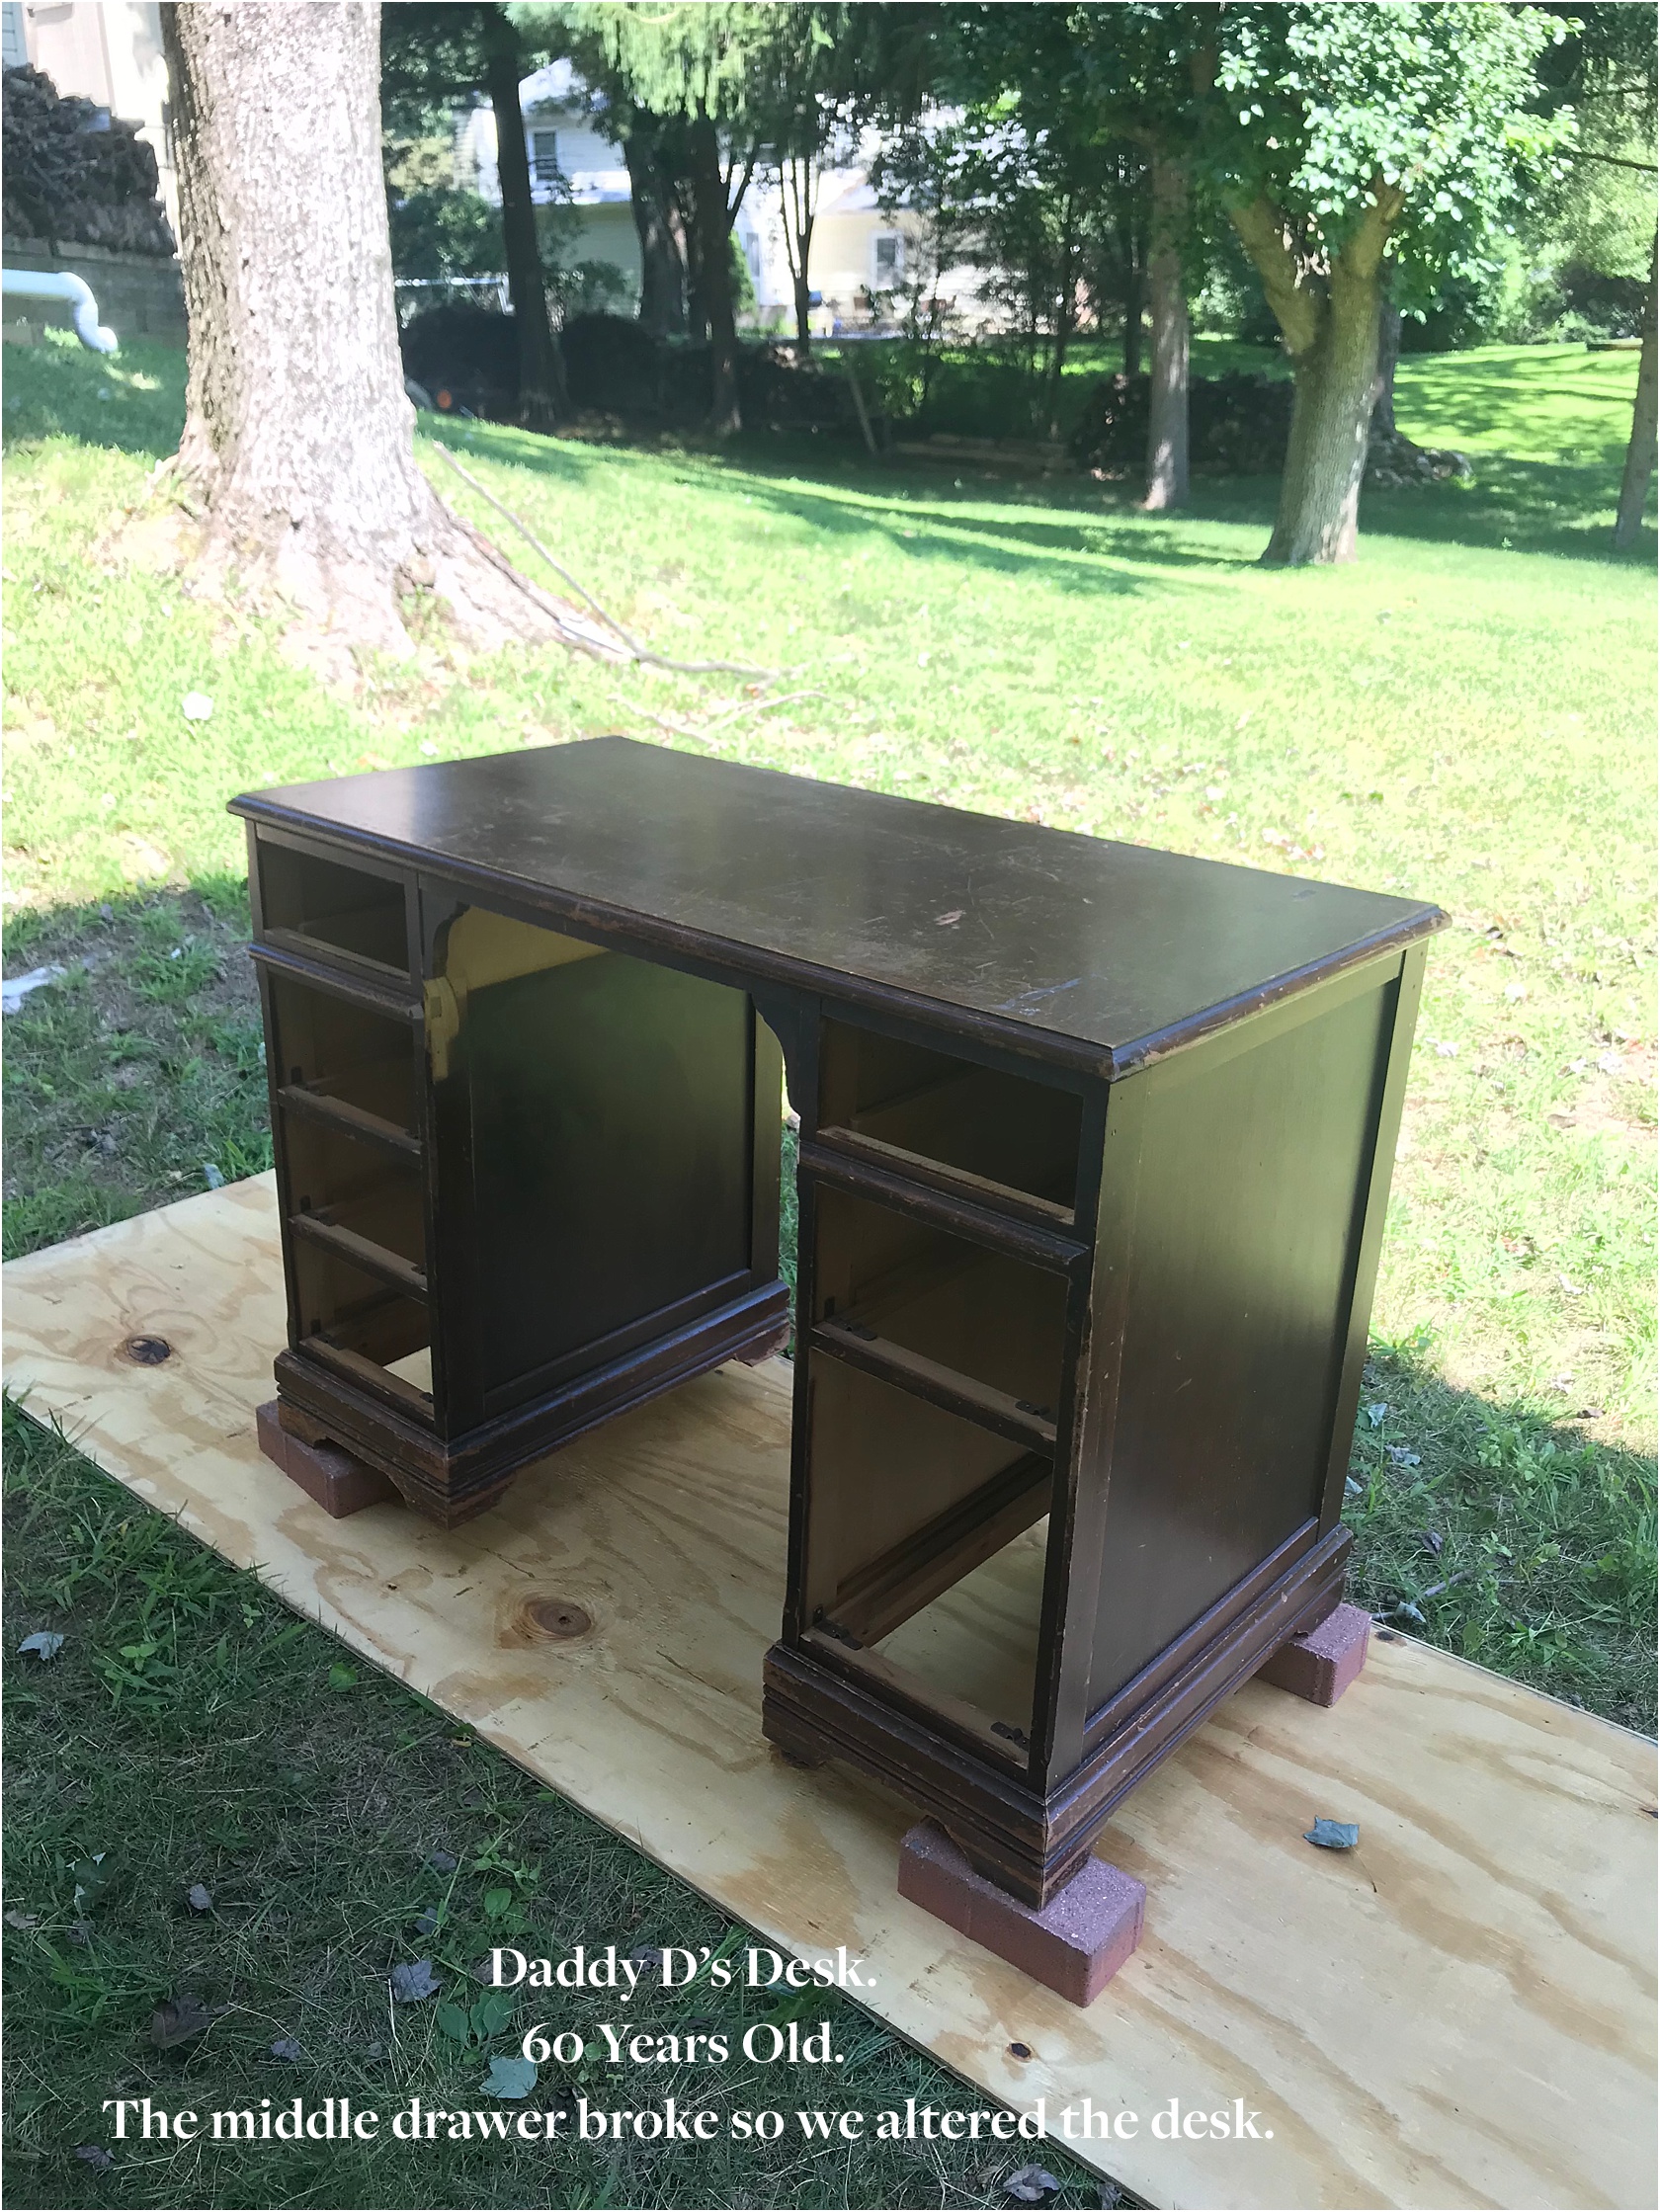
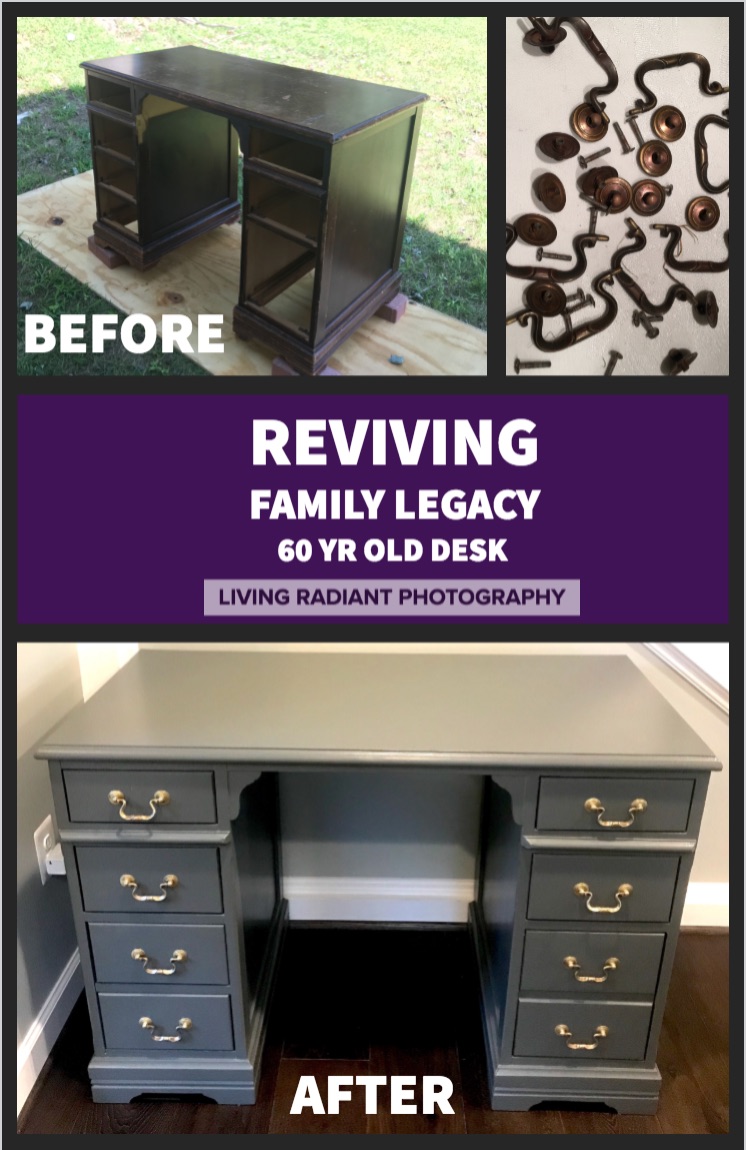
About a year ago, Patrick’s dad, Bunk, pulled a desk out of storage. It was a mess. It needed serious love. It has broken drawers and the middle one actually was broken and Patrick and Bunk decided to fix it. I always thought we should do something with it, I just didn’t know what. The desk belonged to Bunks Dad, Daddy D they called him. Patrick’s grandfather.
Then about a month ago, it came to me. I’ve lived overseas, I love to travel, and I’ve been to 9 nations. I got a fortune cookie in high school that said “Your Feet will cover the soil of many nations.” I totally believe it was prophetic and the Lord speaking something into my heart that I didn’t even know.
So fast forward to last week. I was feeling down, stale, unmotivated. We are in the start of the fall wedding season with 18 weddings left before New Years and I didn’t want to go into it feeling the way I was, so I literally told Patrick, “I need to do something else creative.” I needed another outlet for this creative girl to get inspired, to find joy again, to renew passion and the things I loved. Then it hit me. Patrick was in the basement moving stuff around and I asked him to leave the desk out. I knew I wanted to fix it, restore this 60 year old family heirloom. Bunk gave it to us and gave me the freedom to do with it whatever I’d like. So I took it and ran.
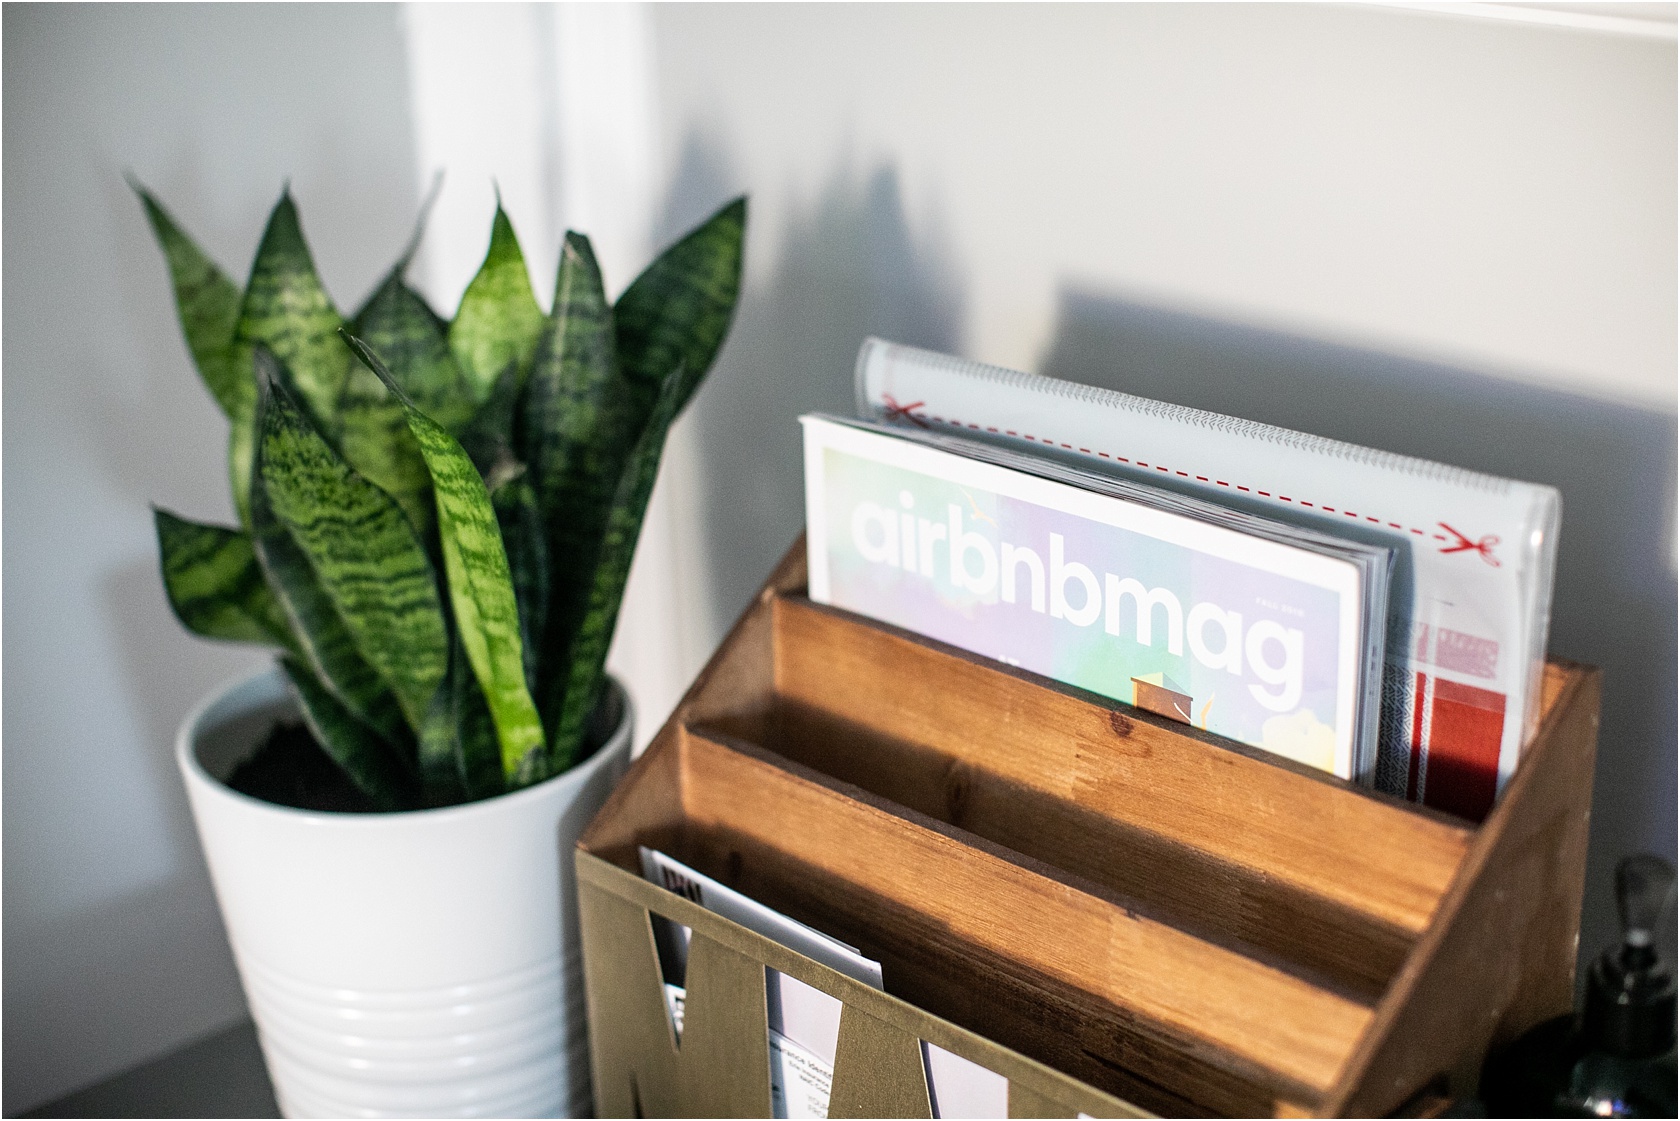
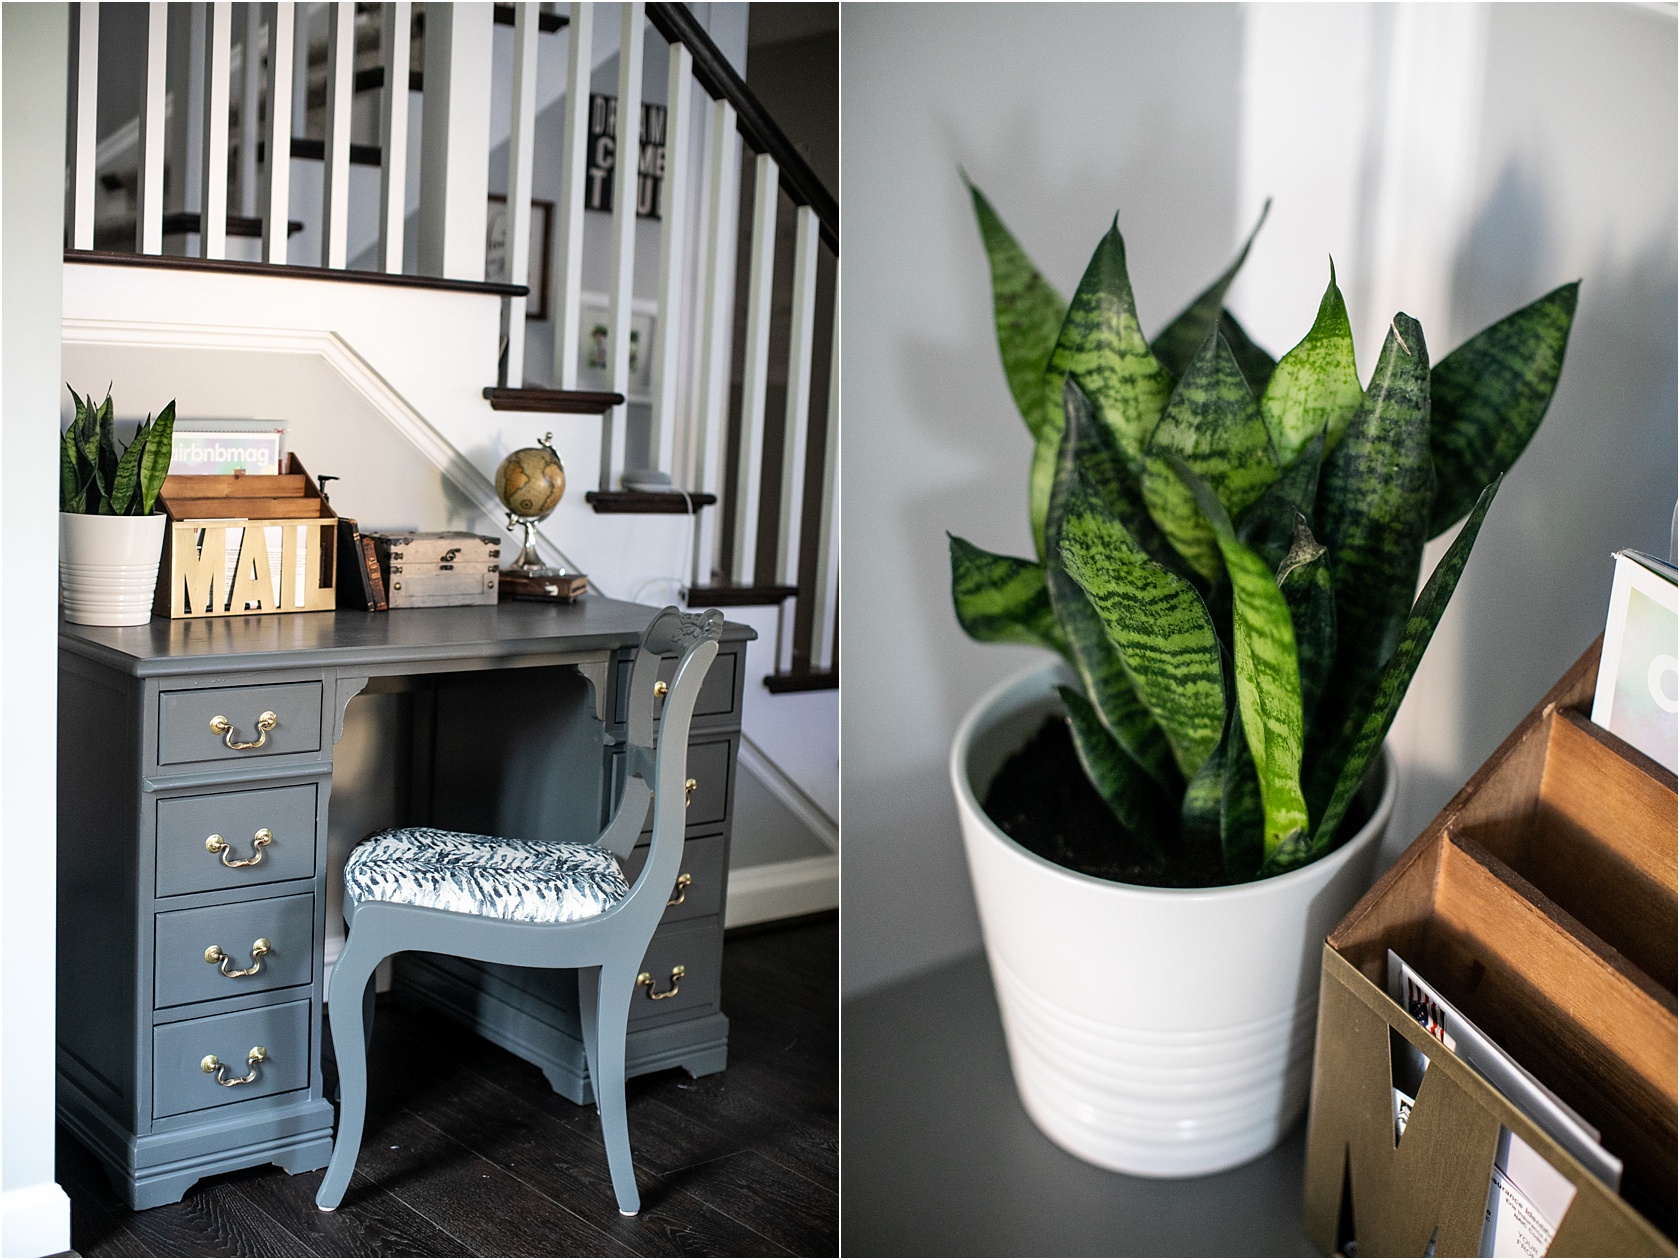
This is the desk. We repaired the middle drawer by trashing the drawer and added pieces from the desk to tie in the corners. The entire thing would need to be sanded down, both with an electric hand sander and manually with a sanding block.
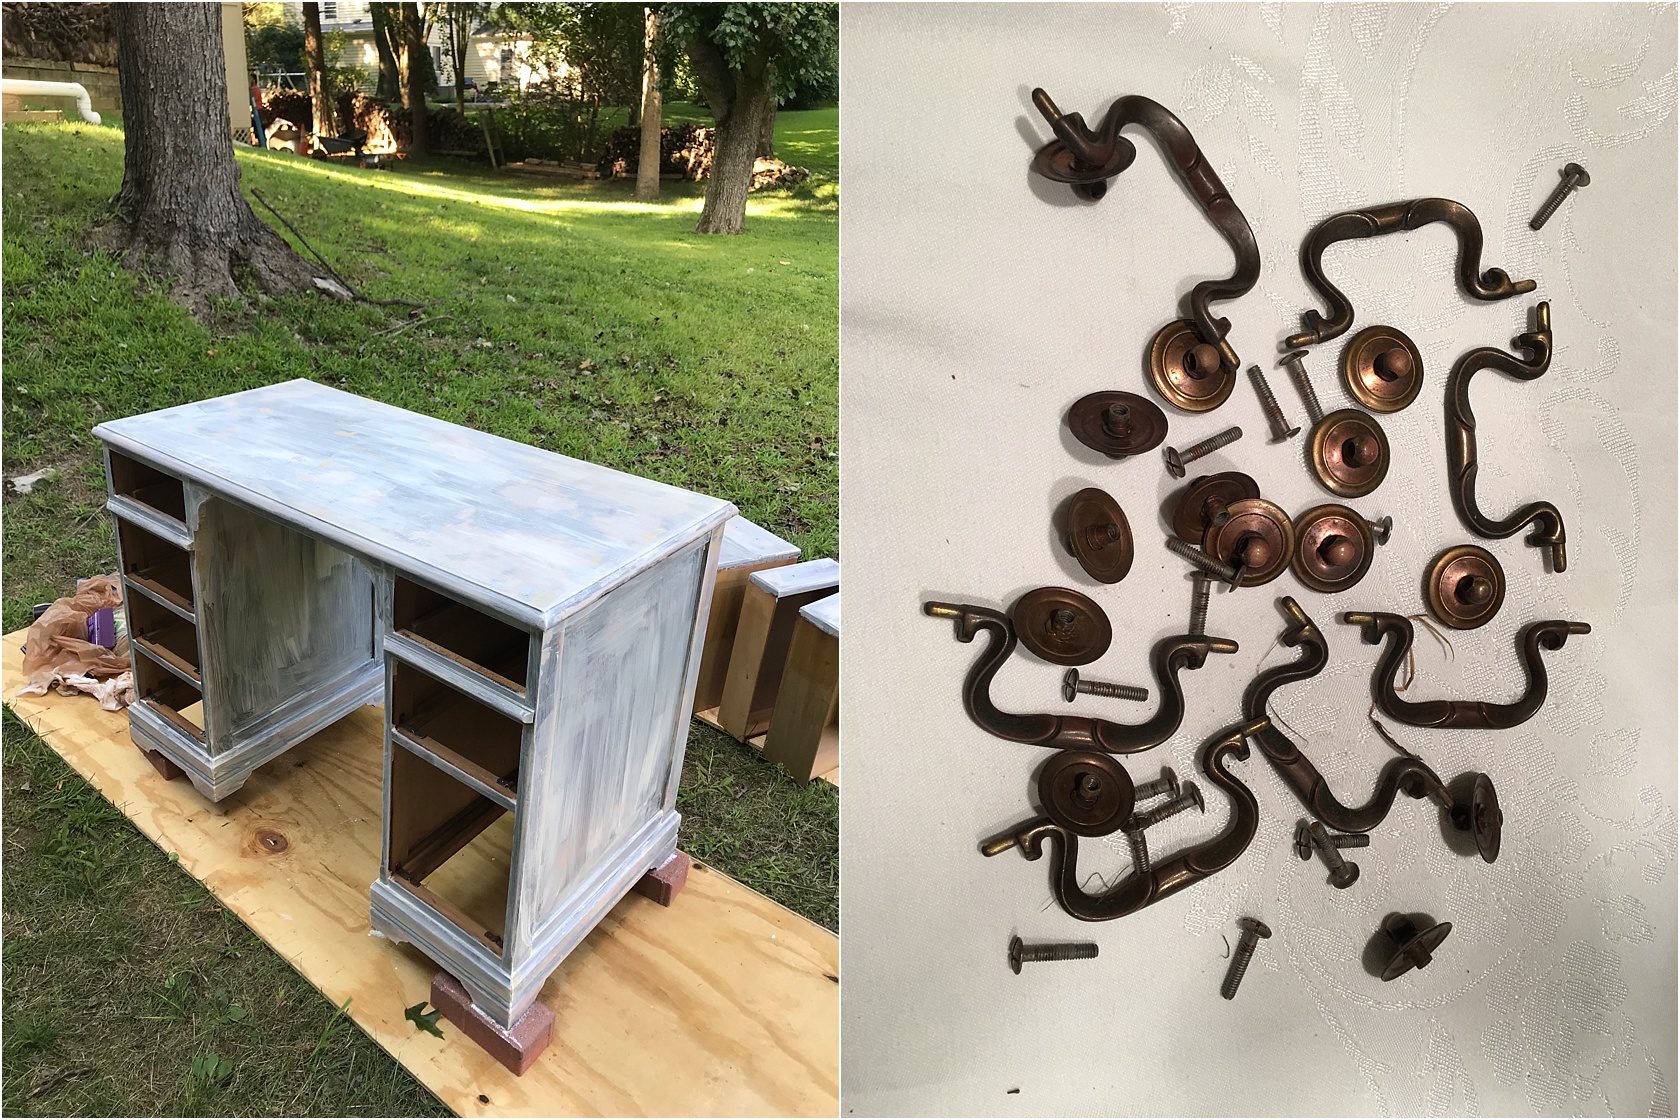
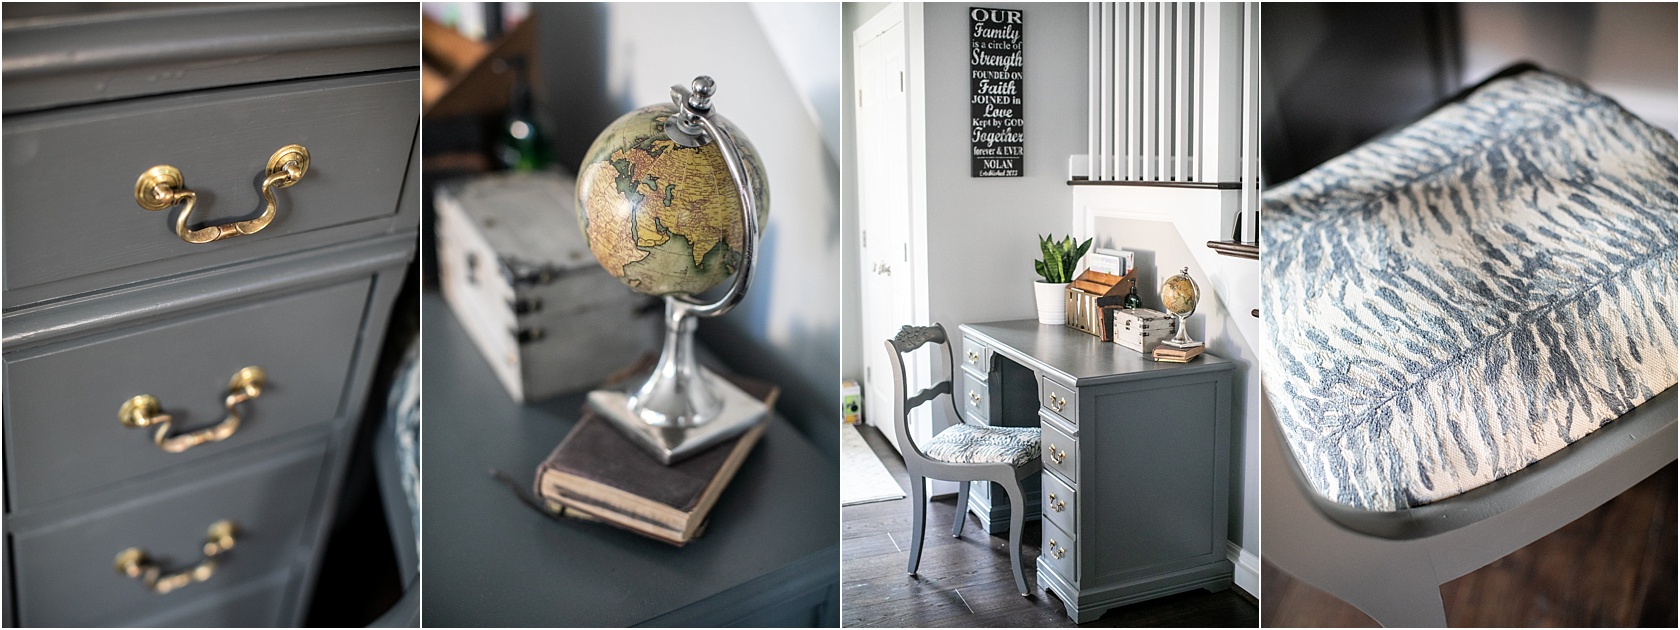
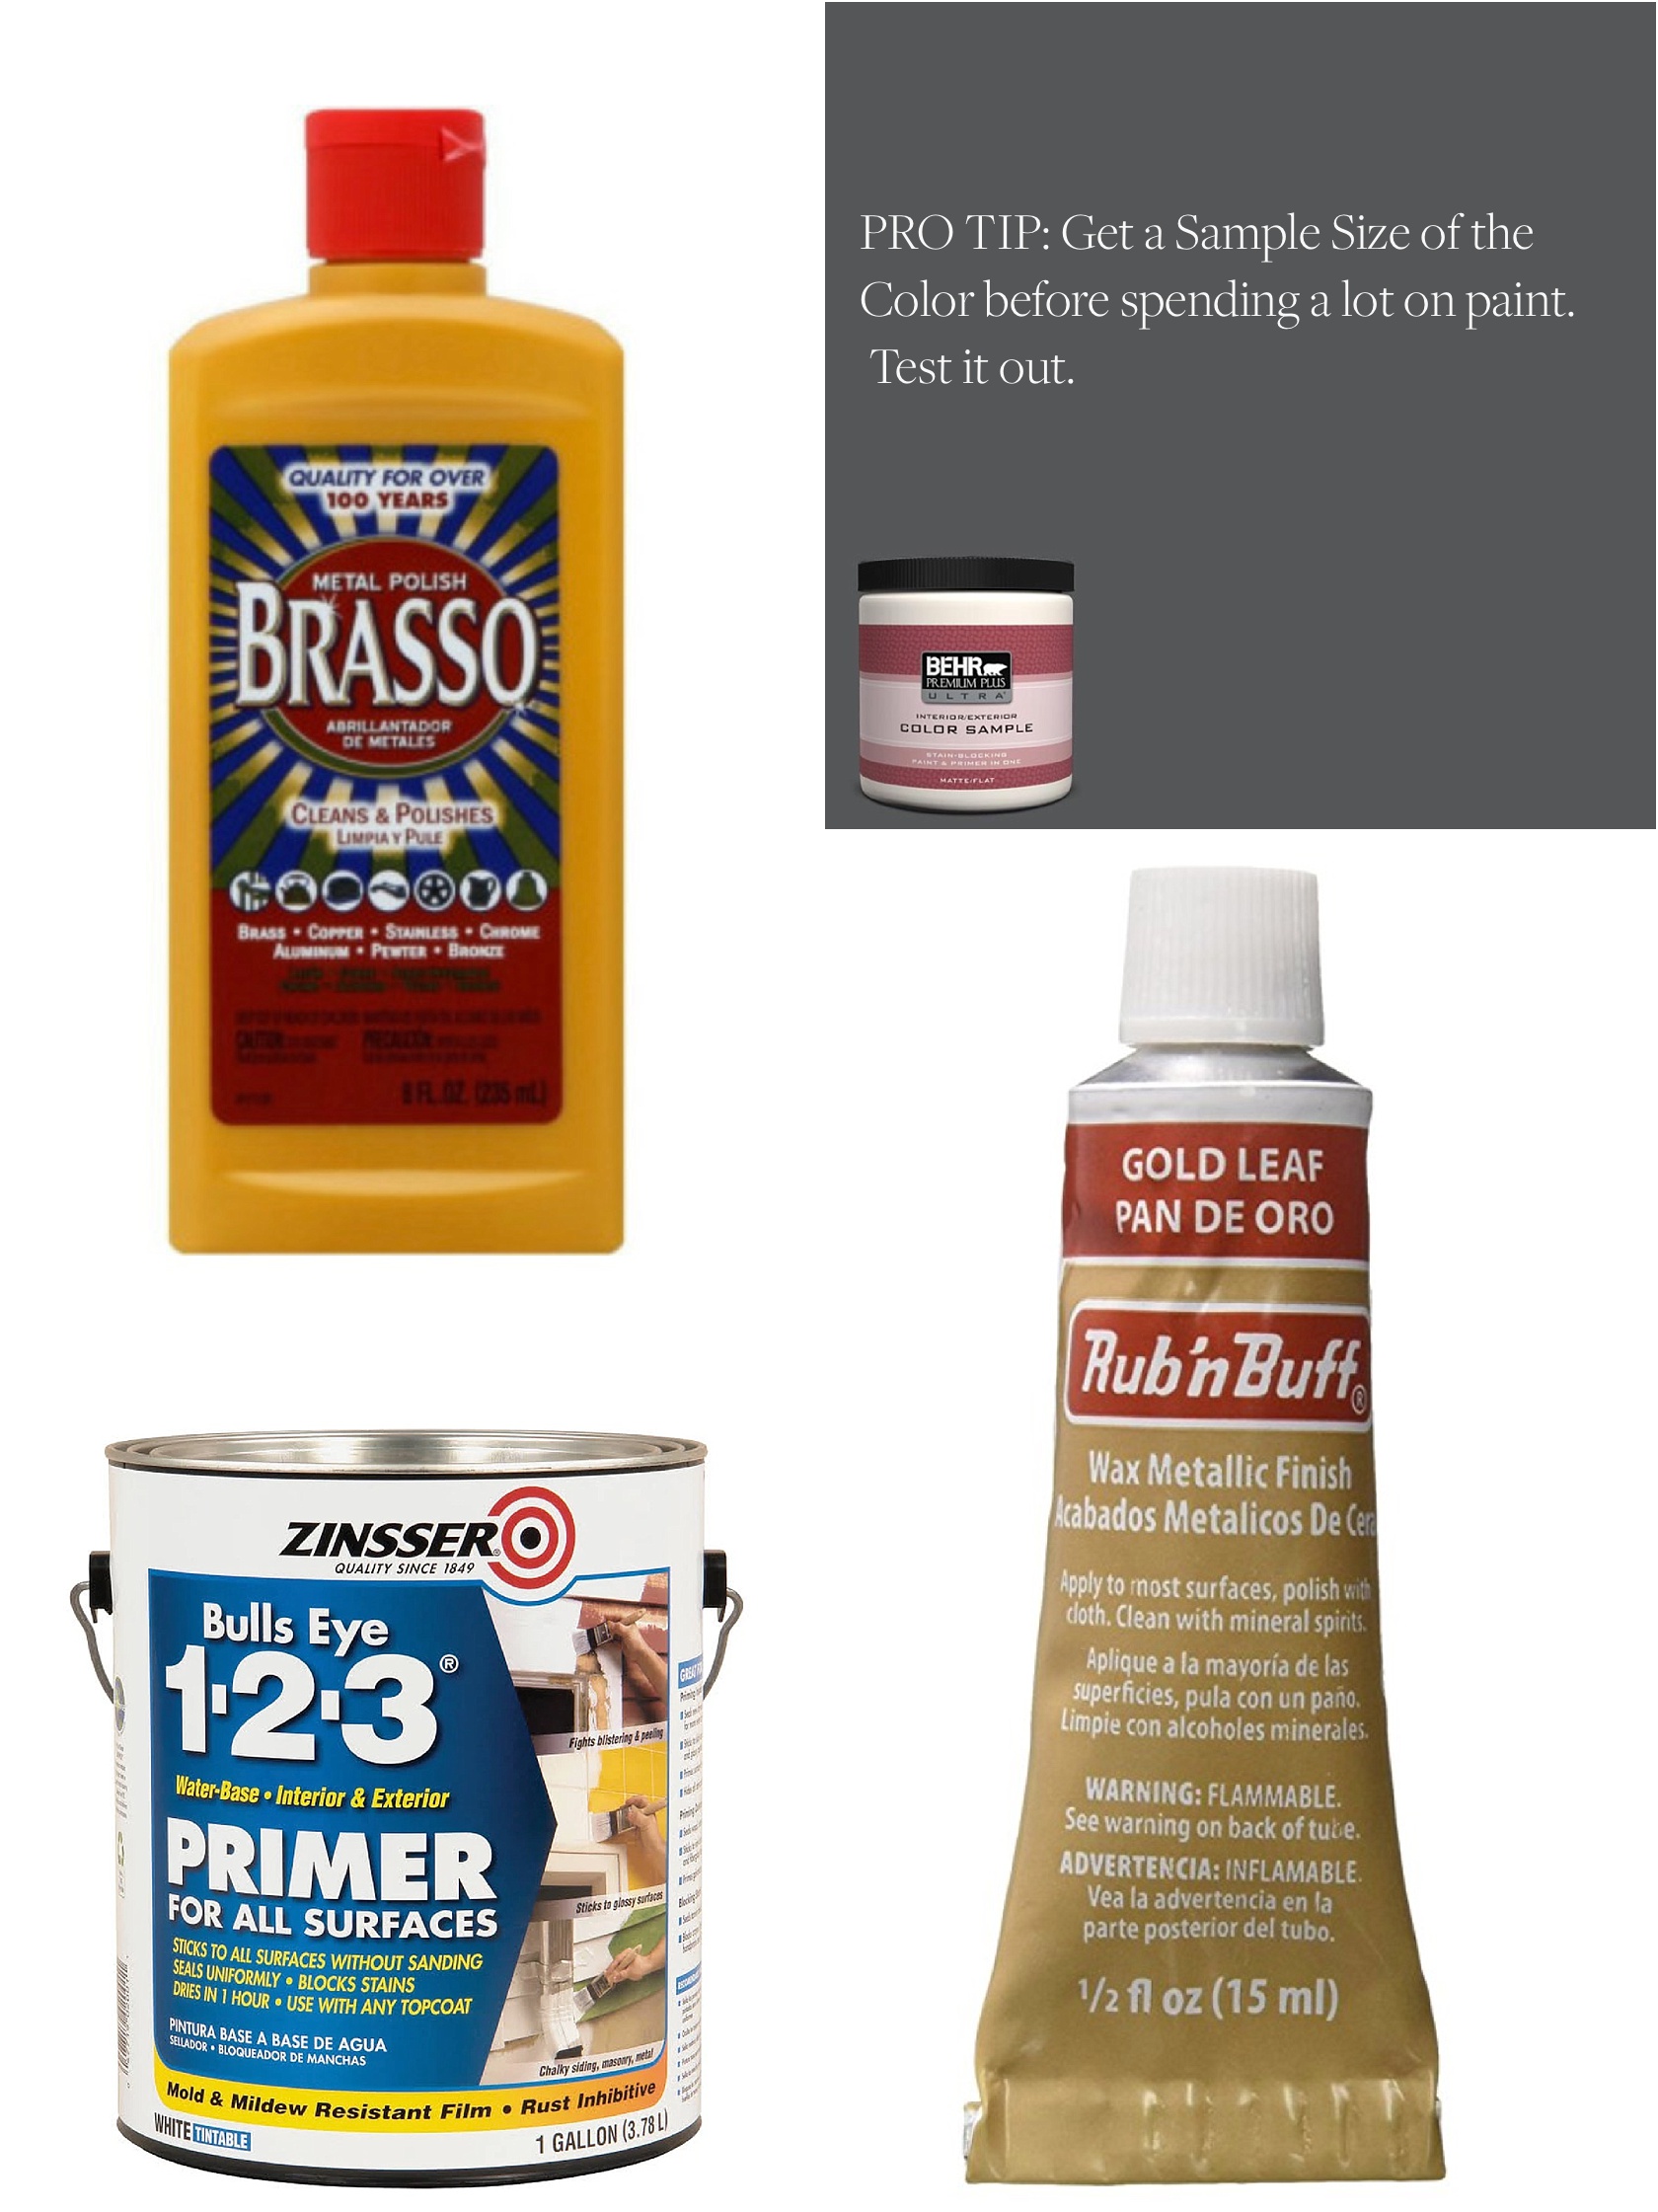
I took off all the original hardware which I was going to replace entirely, but later on realized it was real solid brass hardware AND it was tarnished. So I decided to spend time cleaning and polishing them. Wait until you see what happens. I painted 1 layer of Primer after wiping the whole piece and it’s drawers with a wet washcloth (just water, can use a Pinesol or something).
Once it was dry, I did two coats of paint (I choose Behr “Shadow” in Satin finish because it’s not super glossy but still not matte). Dark Gray is my new favorite. That and Navy. You have to wait about an hour or 2 between coats to paint. Same with the primer, otherwise it gets tacky and gummy. No bueno.
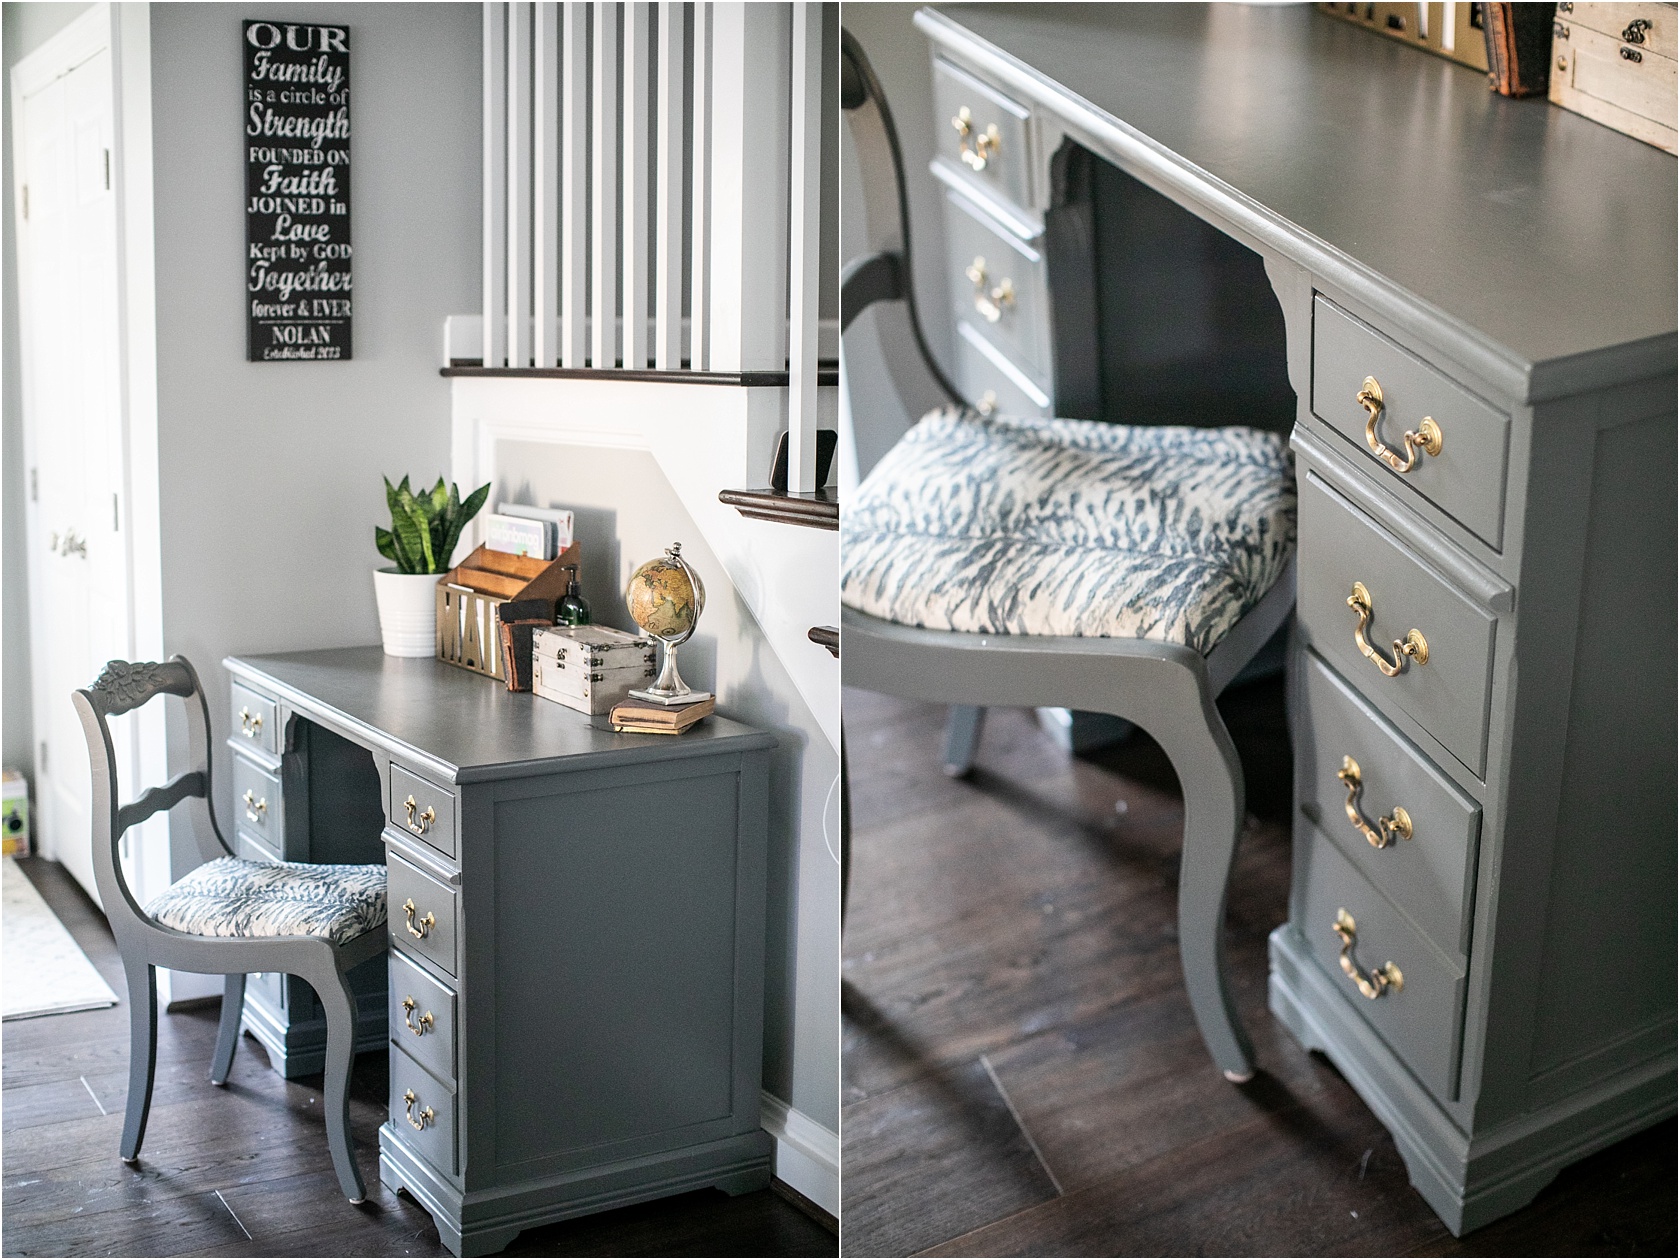
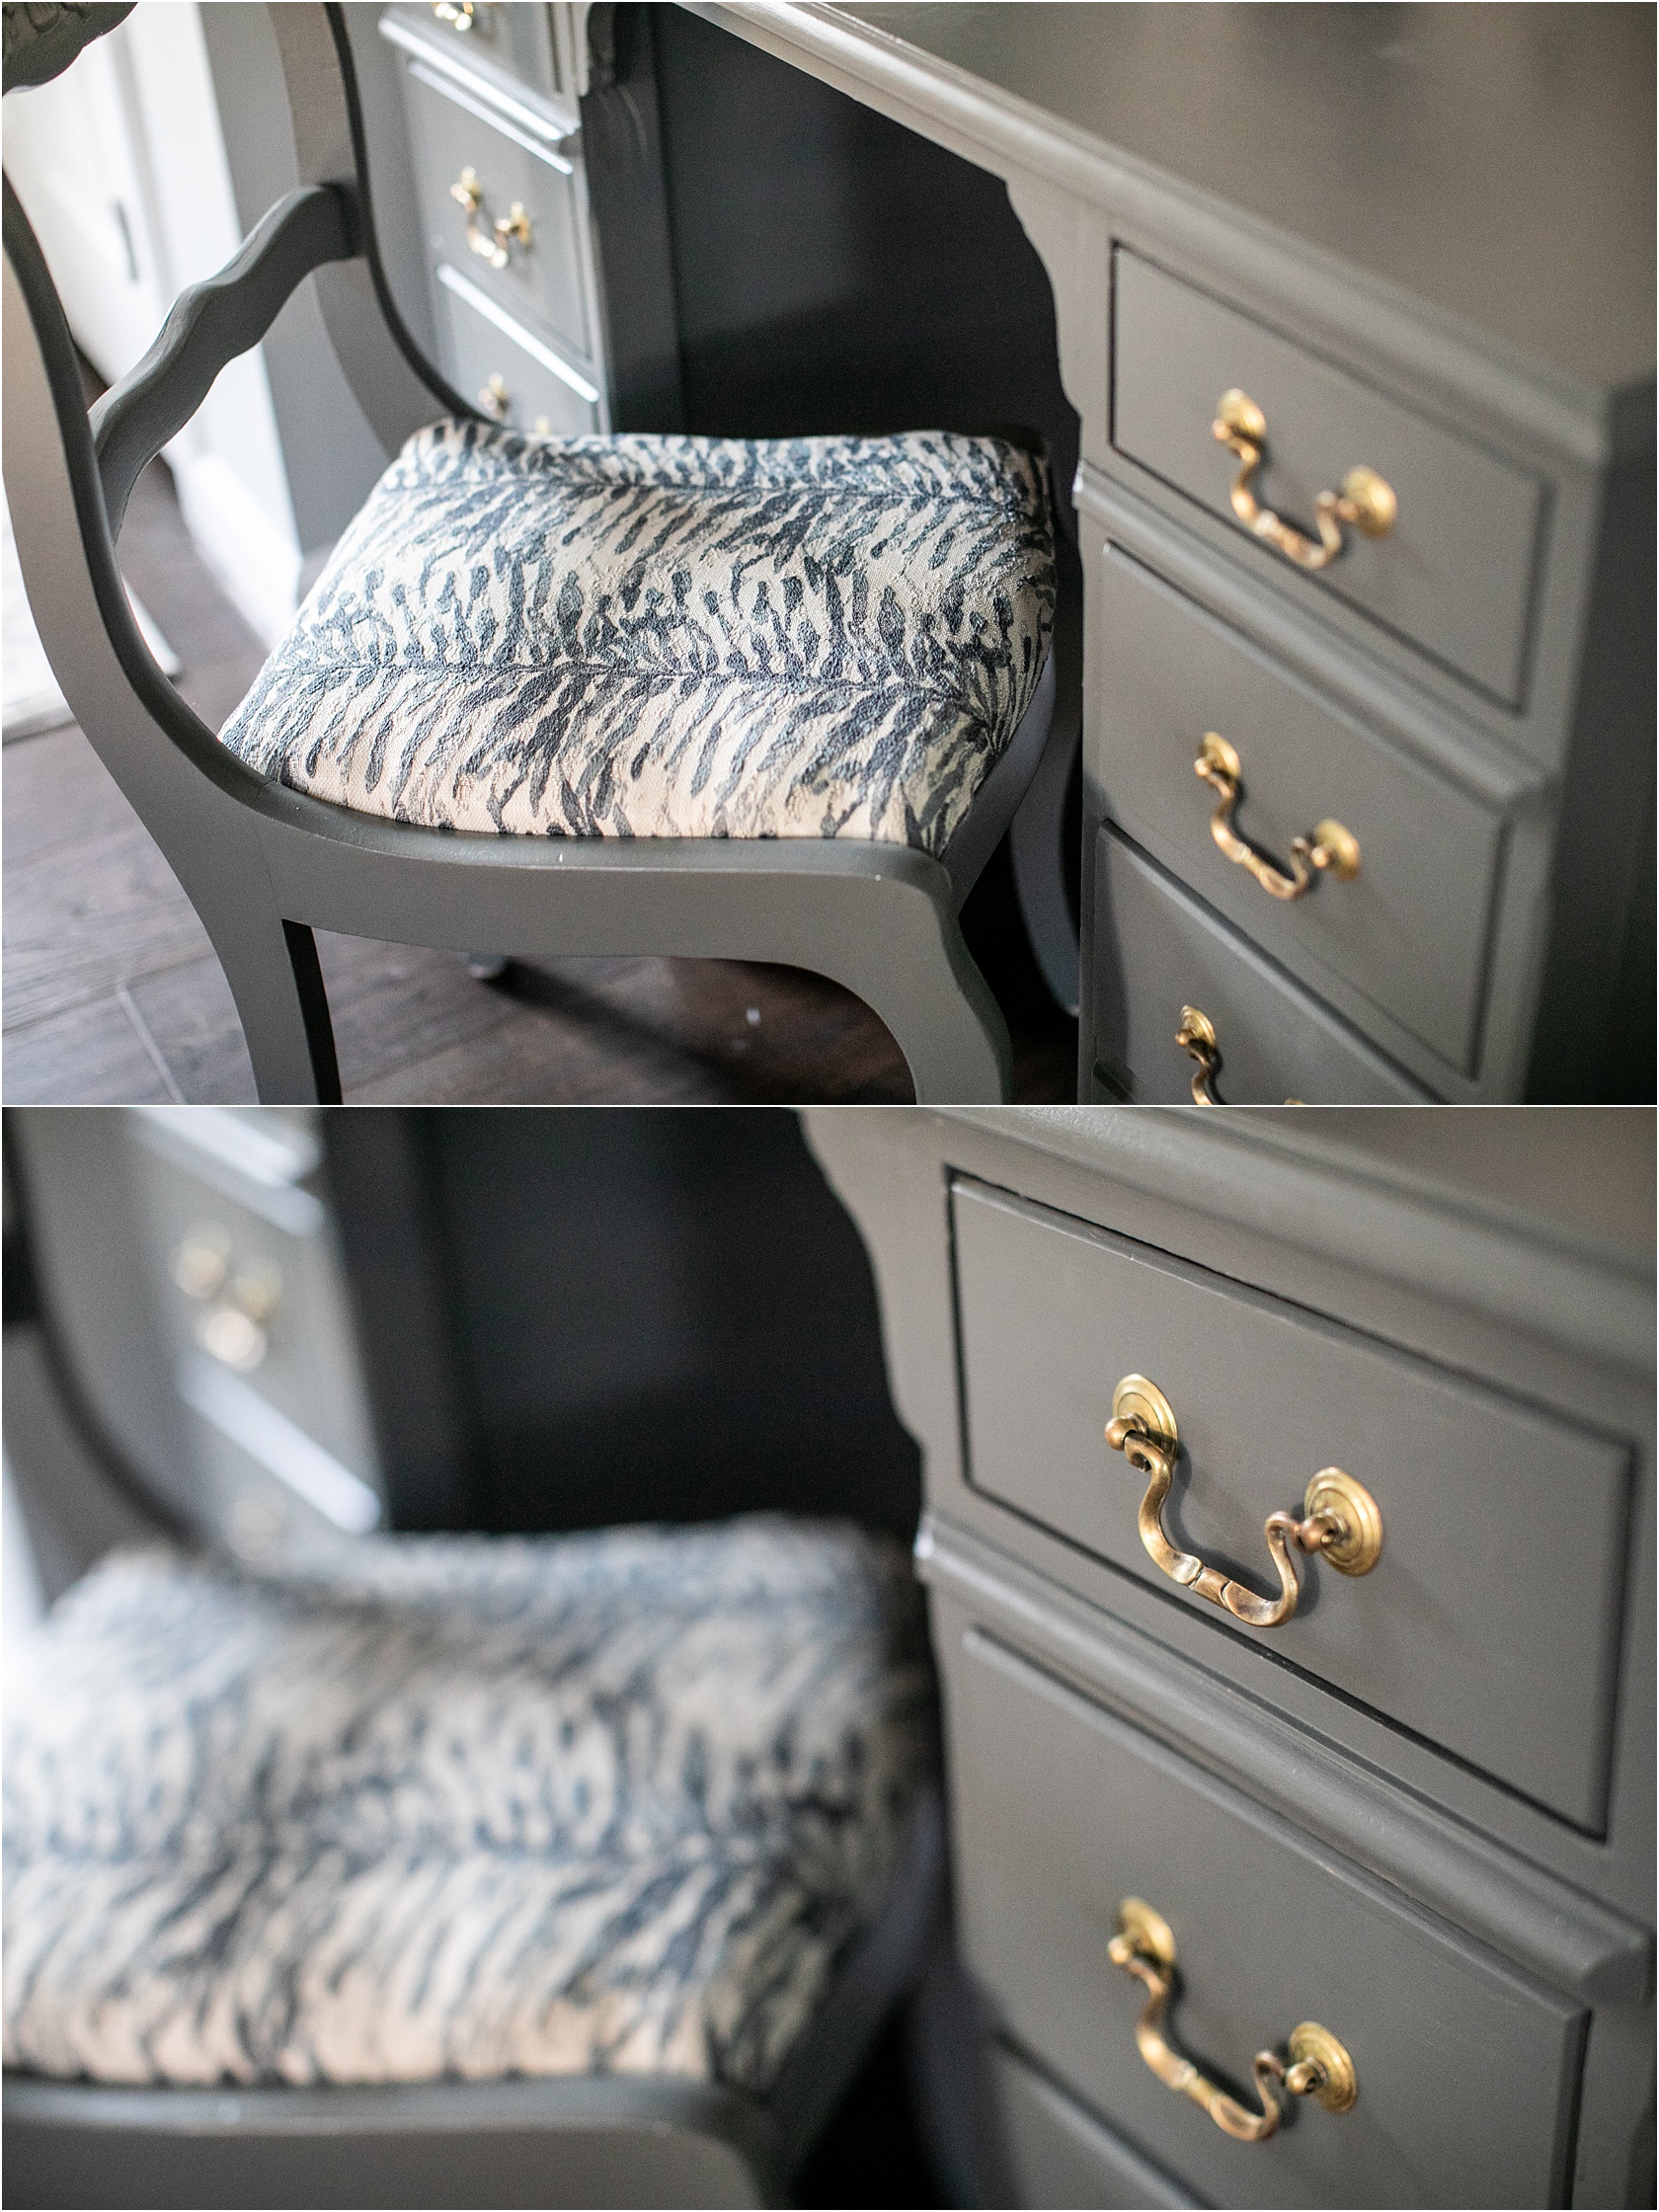
Once everything was dry, I put the hardware back on and put the drawers in. This is the finished product for the desk. Pretty incredible, right! I lined the drawers with black contact paper too just to give the interior a clean slate (not shown).
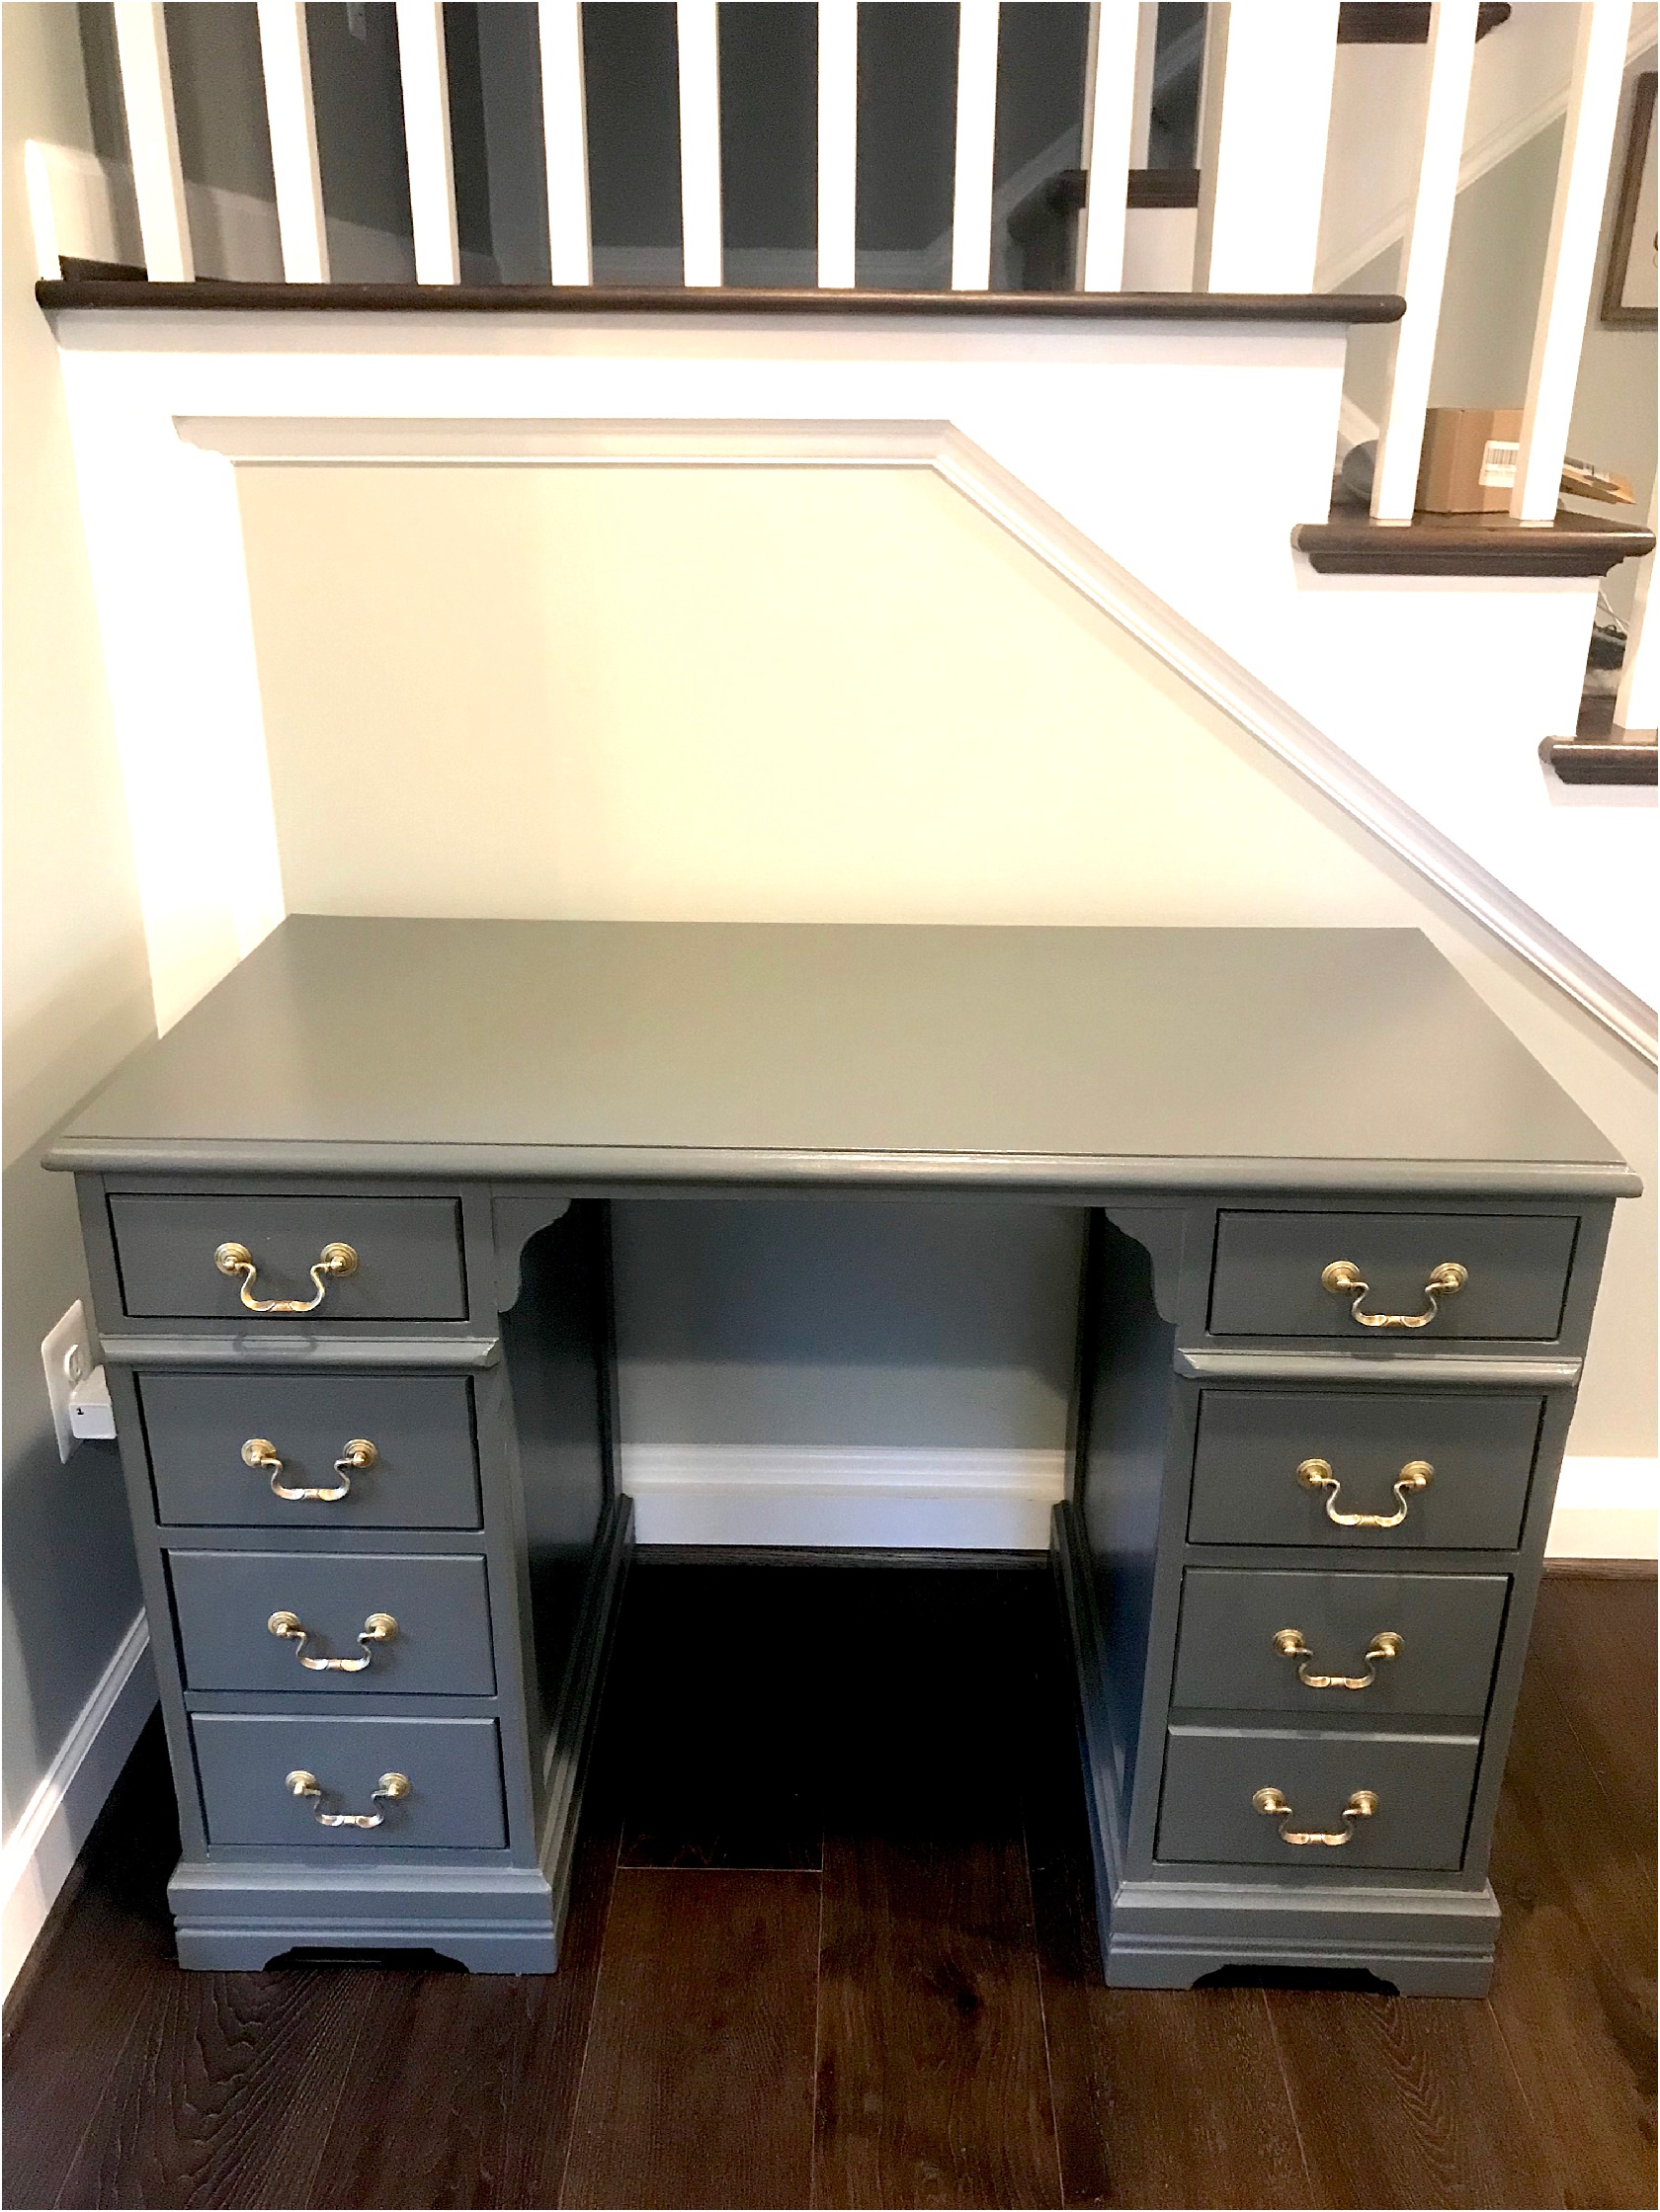
I was so excited. Bunk almost cried when he saw it. He said he remembered he was 10 years old when his dad purchased it. And seeing his grandson, our son, Ezekiel go under it to play hide and seek made it even more special because of the generations who have touched this piece. But I wasn’t done. I felt refreshed, motivated, and knew this piece needed a chair. So I went on my favorite, Facebook Marketplace and began the search for a chair that would compliment this piece.
Let me stop and say, it wasn’t easy. I had all these ideas in my head. I kept thinking I somehow wanted to incorporate the brass gold color but make the chair feel part of it. These were some of the chairs I looked at, but $150, no way. I wasn’t about to pay that for something to sit and collect dust (literally haha).
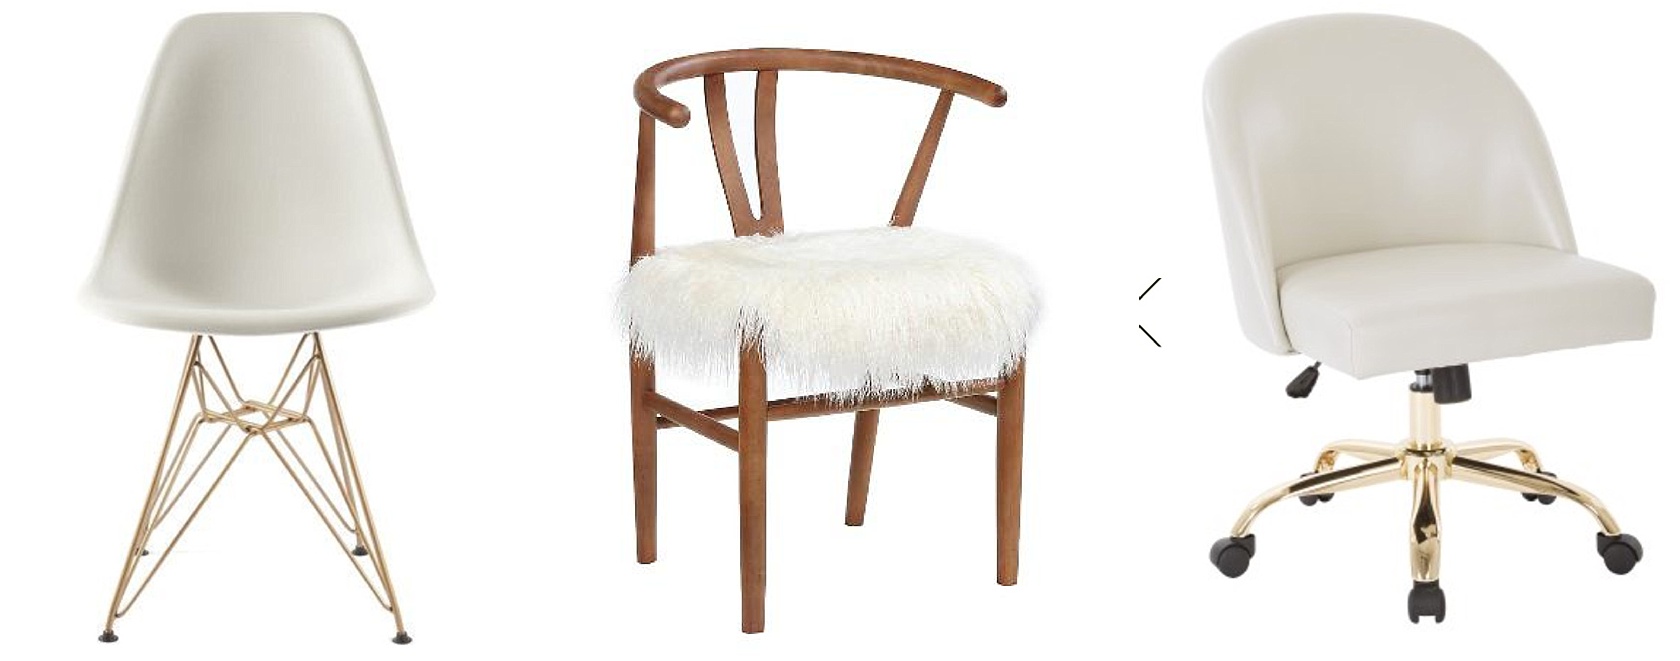
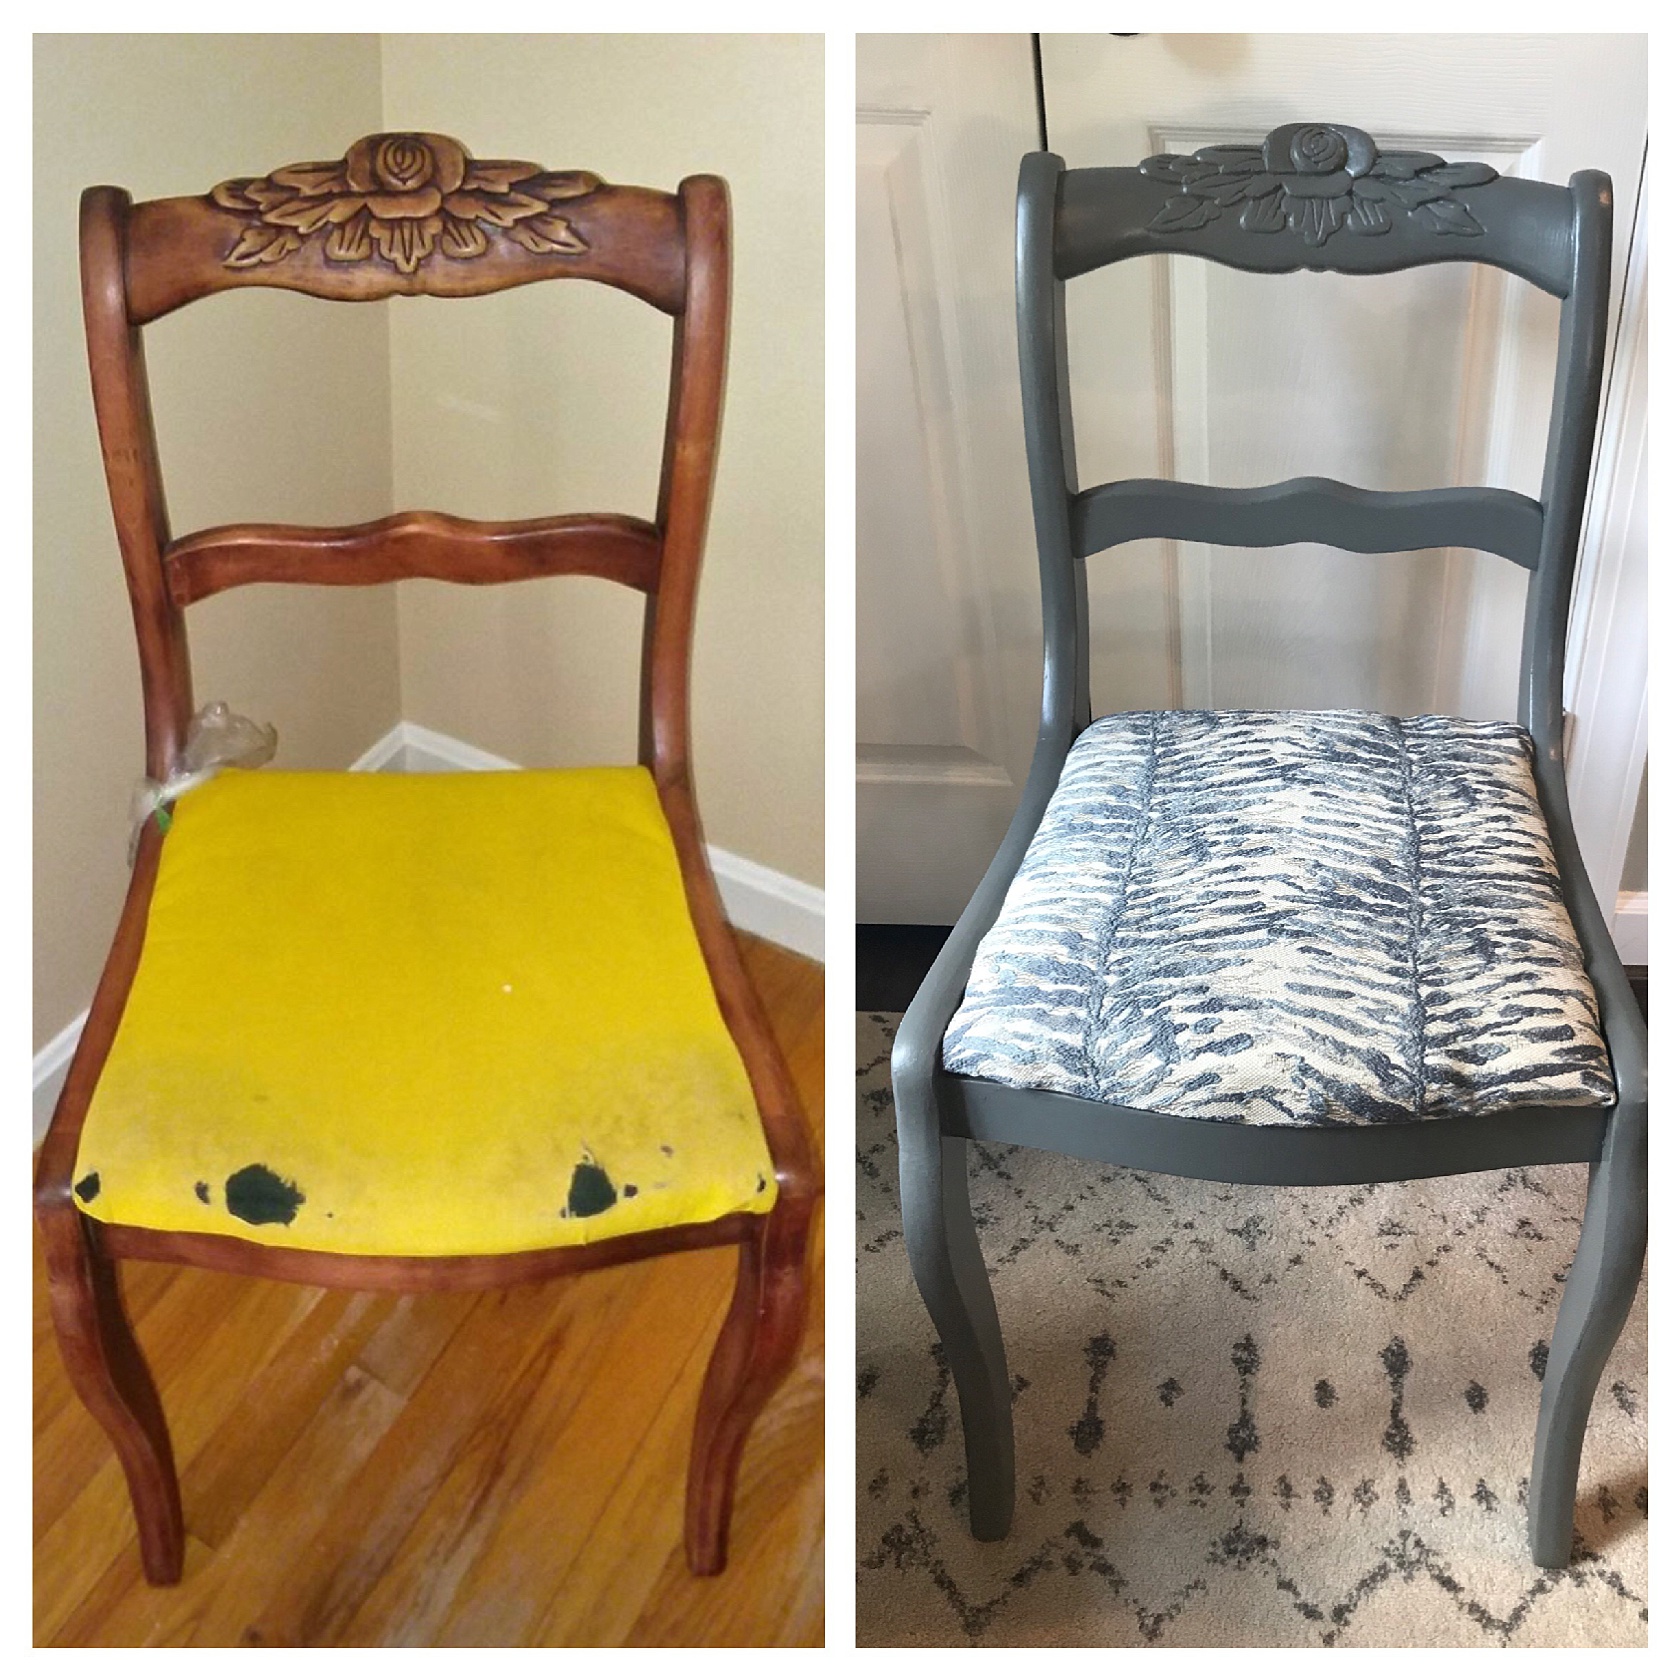
Then I found this. $10.
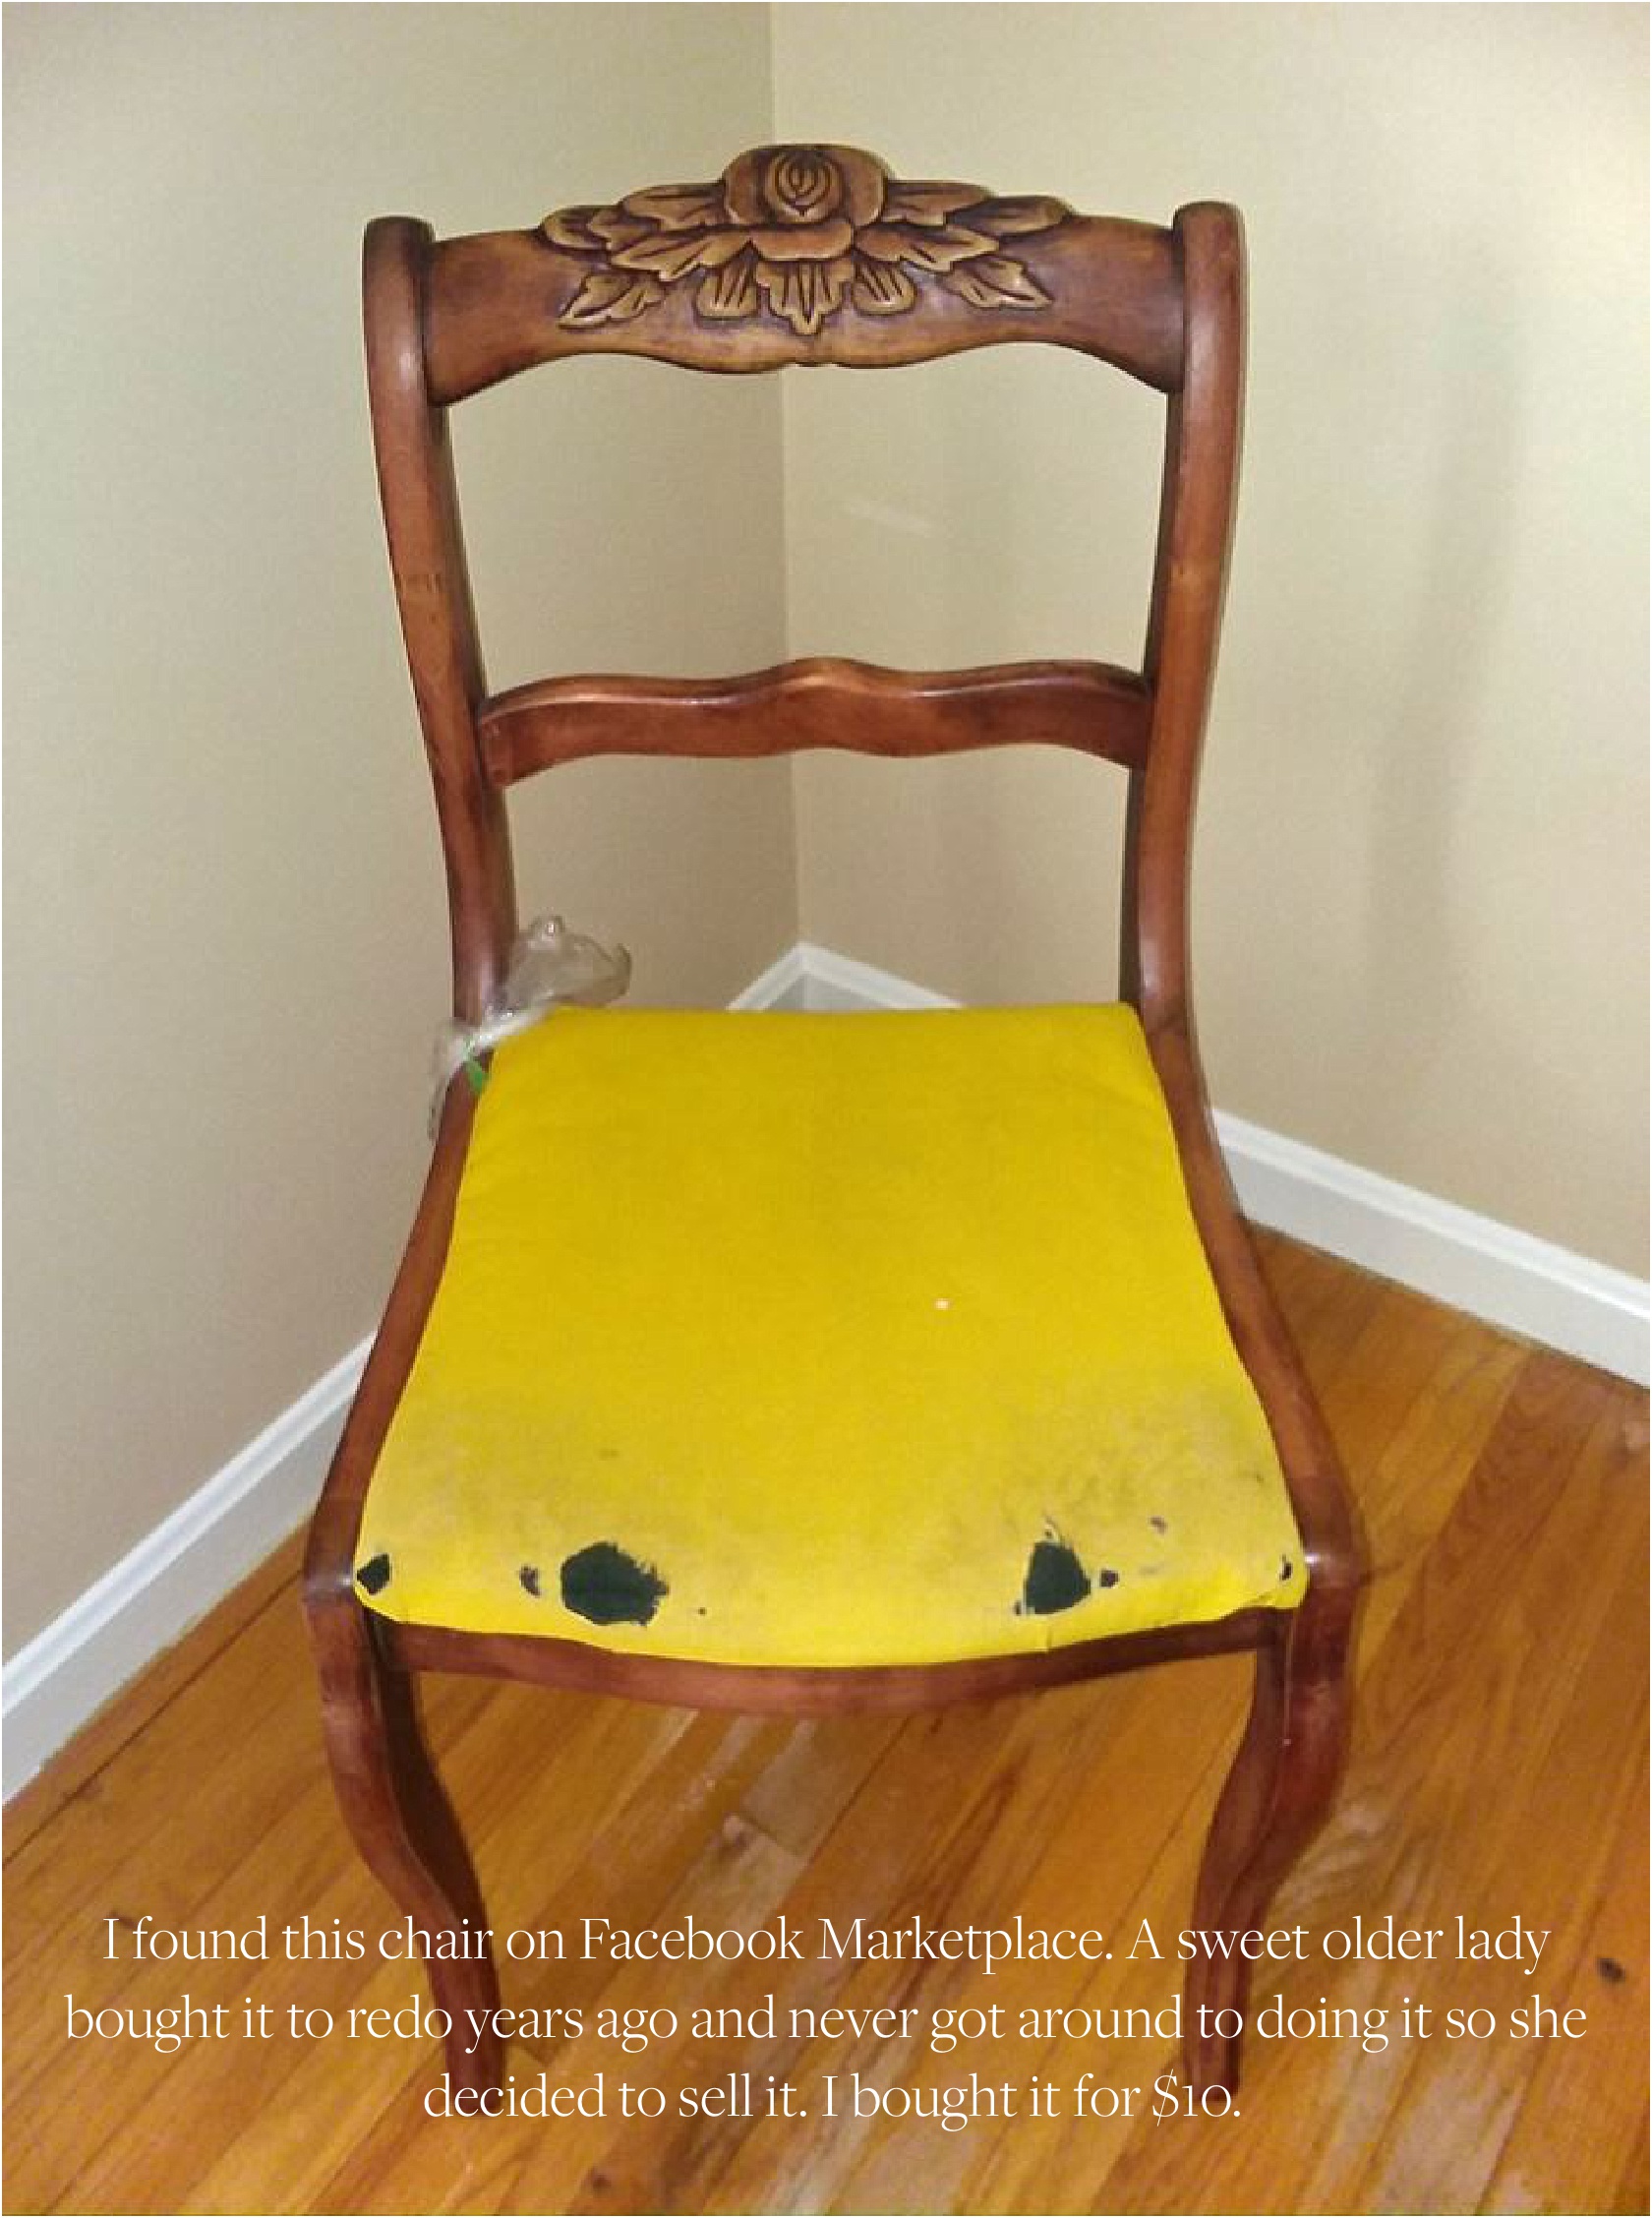
Jane was selling it here in Ellicott City. There was something about it that I wanted. But gosh, what a wreck. I was hopeful I could salvage it and make something beautiful! When I picked up this chair, Jane met me. She was in her late 70s, early 80s. She explained to me that she got it to restore but time got away from her and she was too old to do anything with it now. I told her, “Don’t worry, she’ll come alive again.” She wants me to text her a picture of it when I’m done.
So began the process this week. I took it “apart” which just means removing the seat and taking the seat cushion apart. I sanded it down just like I would any piece of wood to get a rough surface for paint to adhere. I hand sanded and used the electric sander. 11pm was what time I took the photos below because I’m a night owl, duh. We can thank all our couples and the end time of their weddings for that. 😉 wink wink.
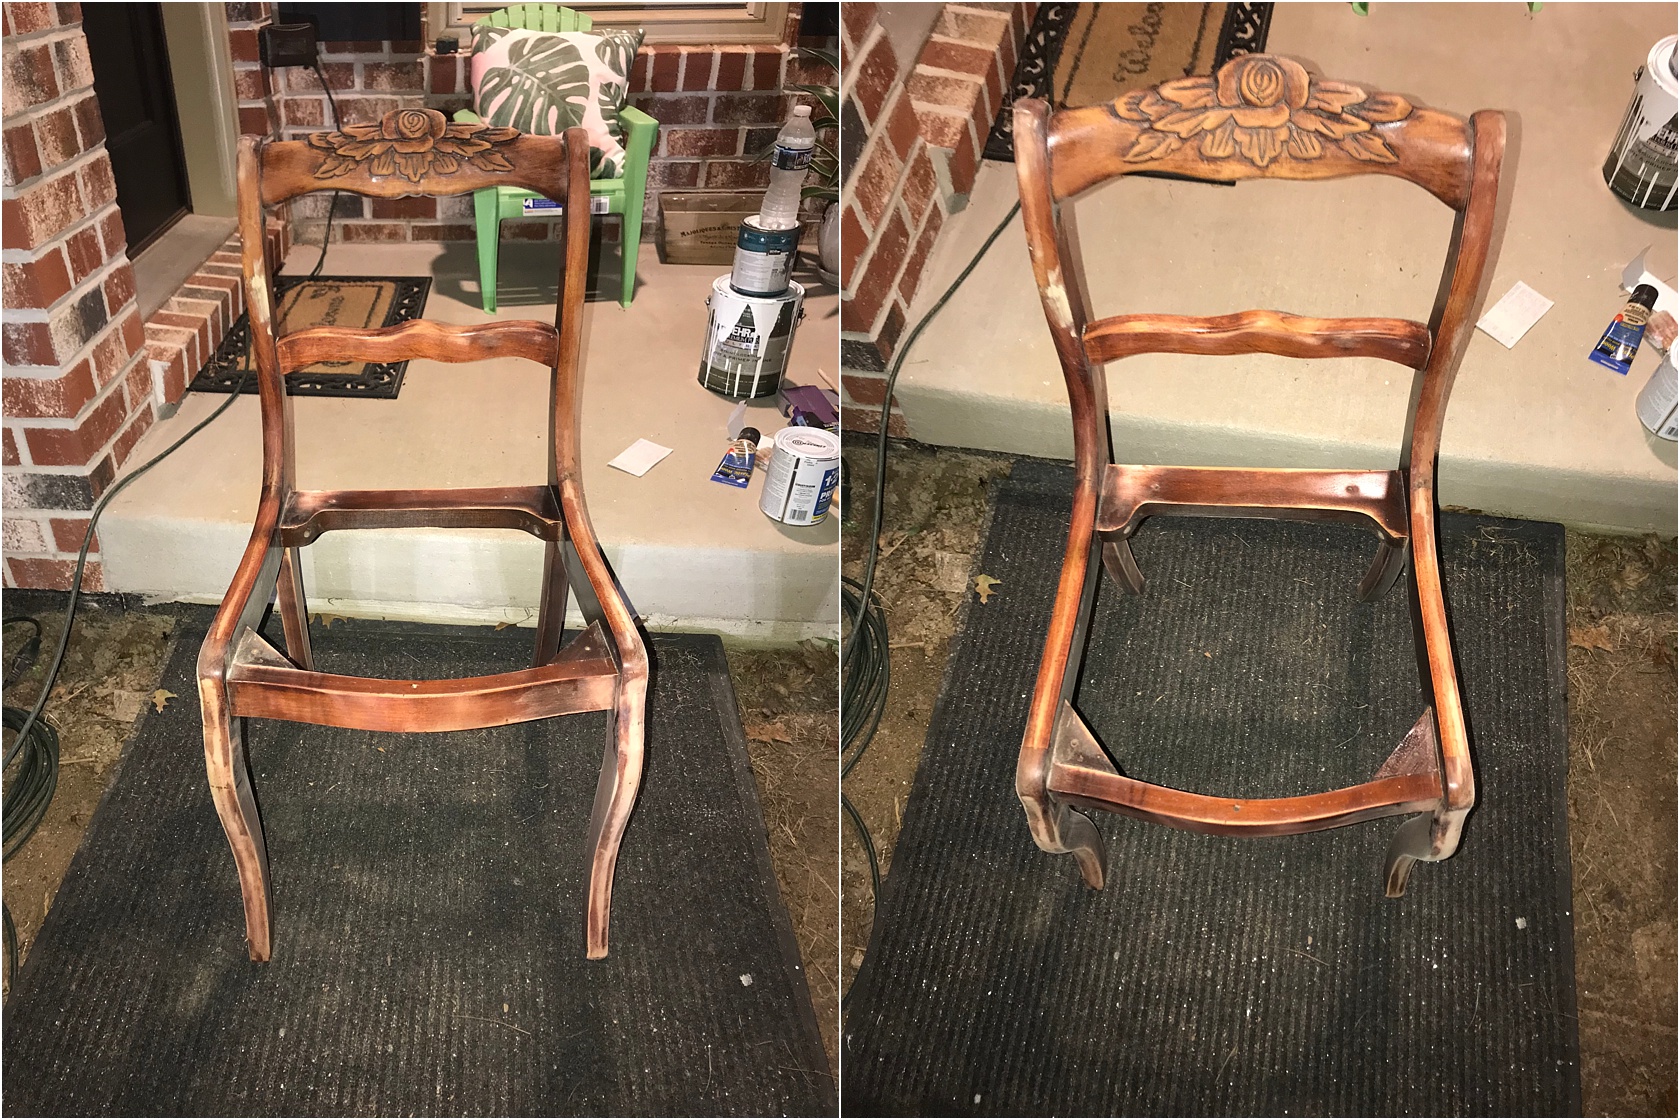
I didn’t know this chair was an antique at the time, I thought it was an imitation Victorian. So I started priming it (inside because of the humidity and the dew). Then I went to bed.
The next day, I painted two layers of the paint that matched the desk it would go with. While the paint on the chair was drying, I packed Zeke up, and he and I headed to Joann Fabrics where I would begin the hunt for fabric. I wanted something that popped but tied in the colors in the desk but also the room it would be in. I went to the indoor upholstery section… Here were my options that I liked that I thought may work with it in similar color families to the desk.
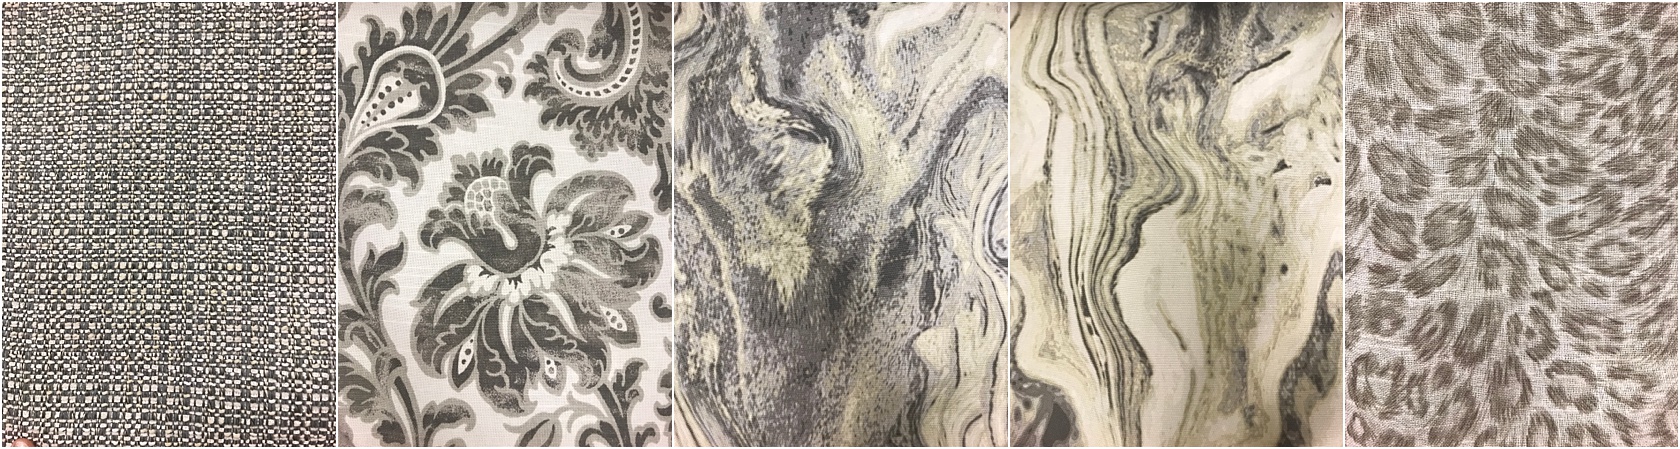
I liked them all but none of them were really speaking to me. Then I found this one. It was like, yep, that’s it.
It reminded me of ferns and pine trees, something special to me because of all the summer adventures with my family in the White Mountains of New Hampshire. And I just hoped it would work. Thankfully I had paint on my hands so matching it was pretty easy. It was priced at $58.00/yard, but was on sale and I got it for $27. I also picked up new batting that I would need to replace the original batting. I soon discovered that the batting on the seat was the original batting, probably like 80+ years old. It was deteriorating and so gross, like crumbling in my hand. And underneath that yellow fabric with the original needlepoint design from the creation of that chair. Pretty neat to think the history there. It was a real Victorian chair.
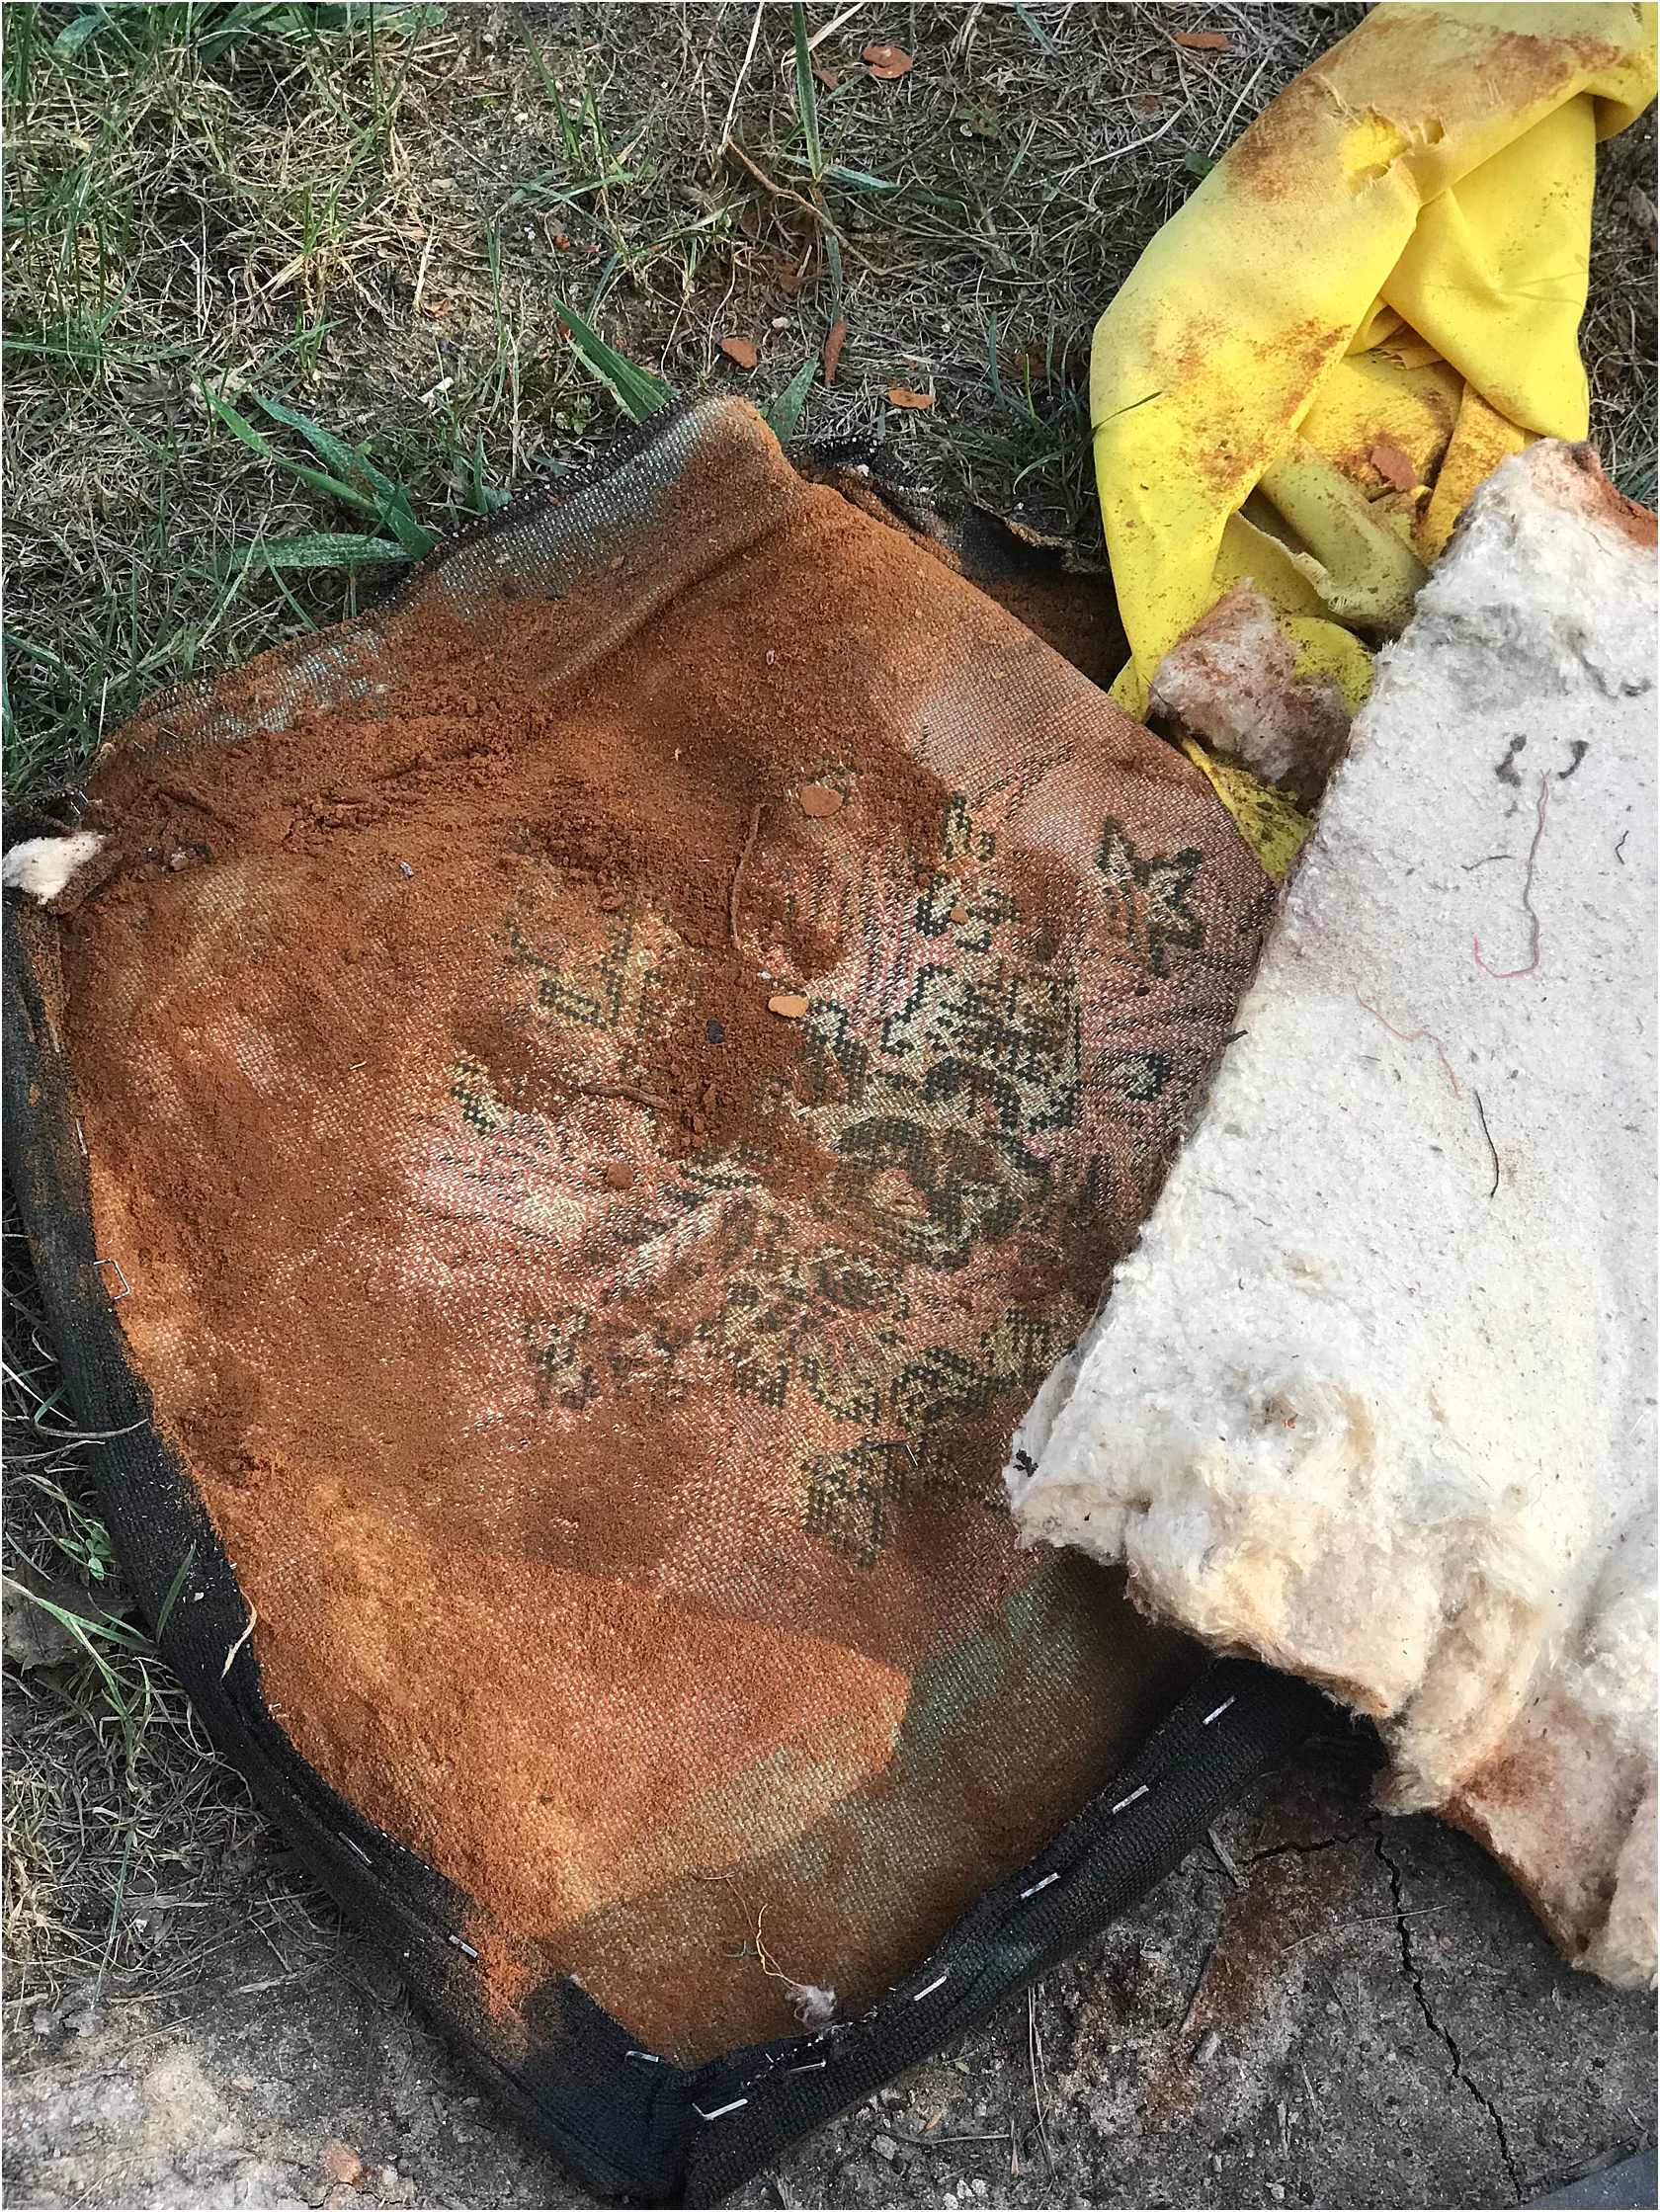
This is the original batting… it’s COTTON and it’s decaying. Amazing… they don’t make it really anymore, or at least I don’t think they do. I have an antique!
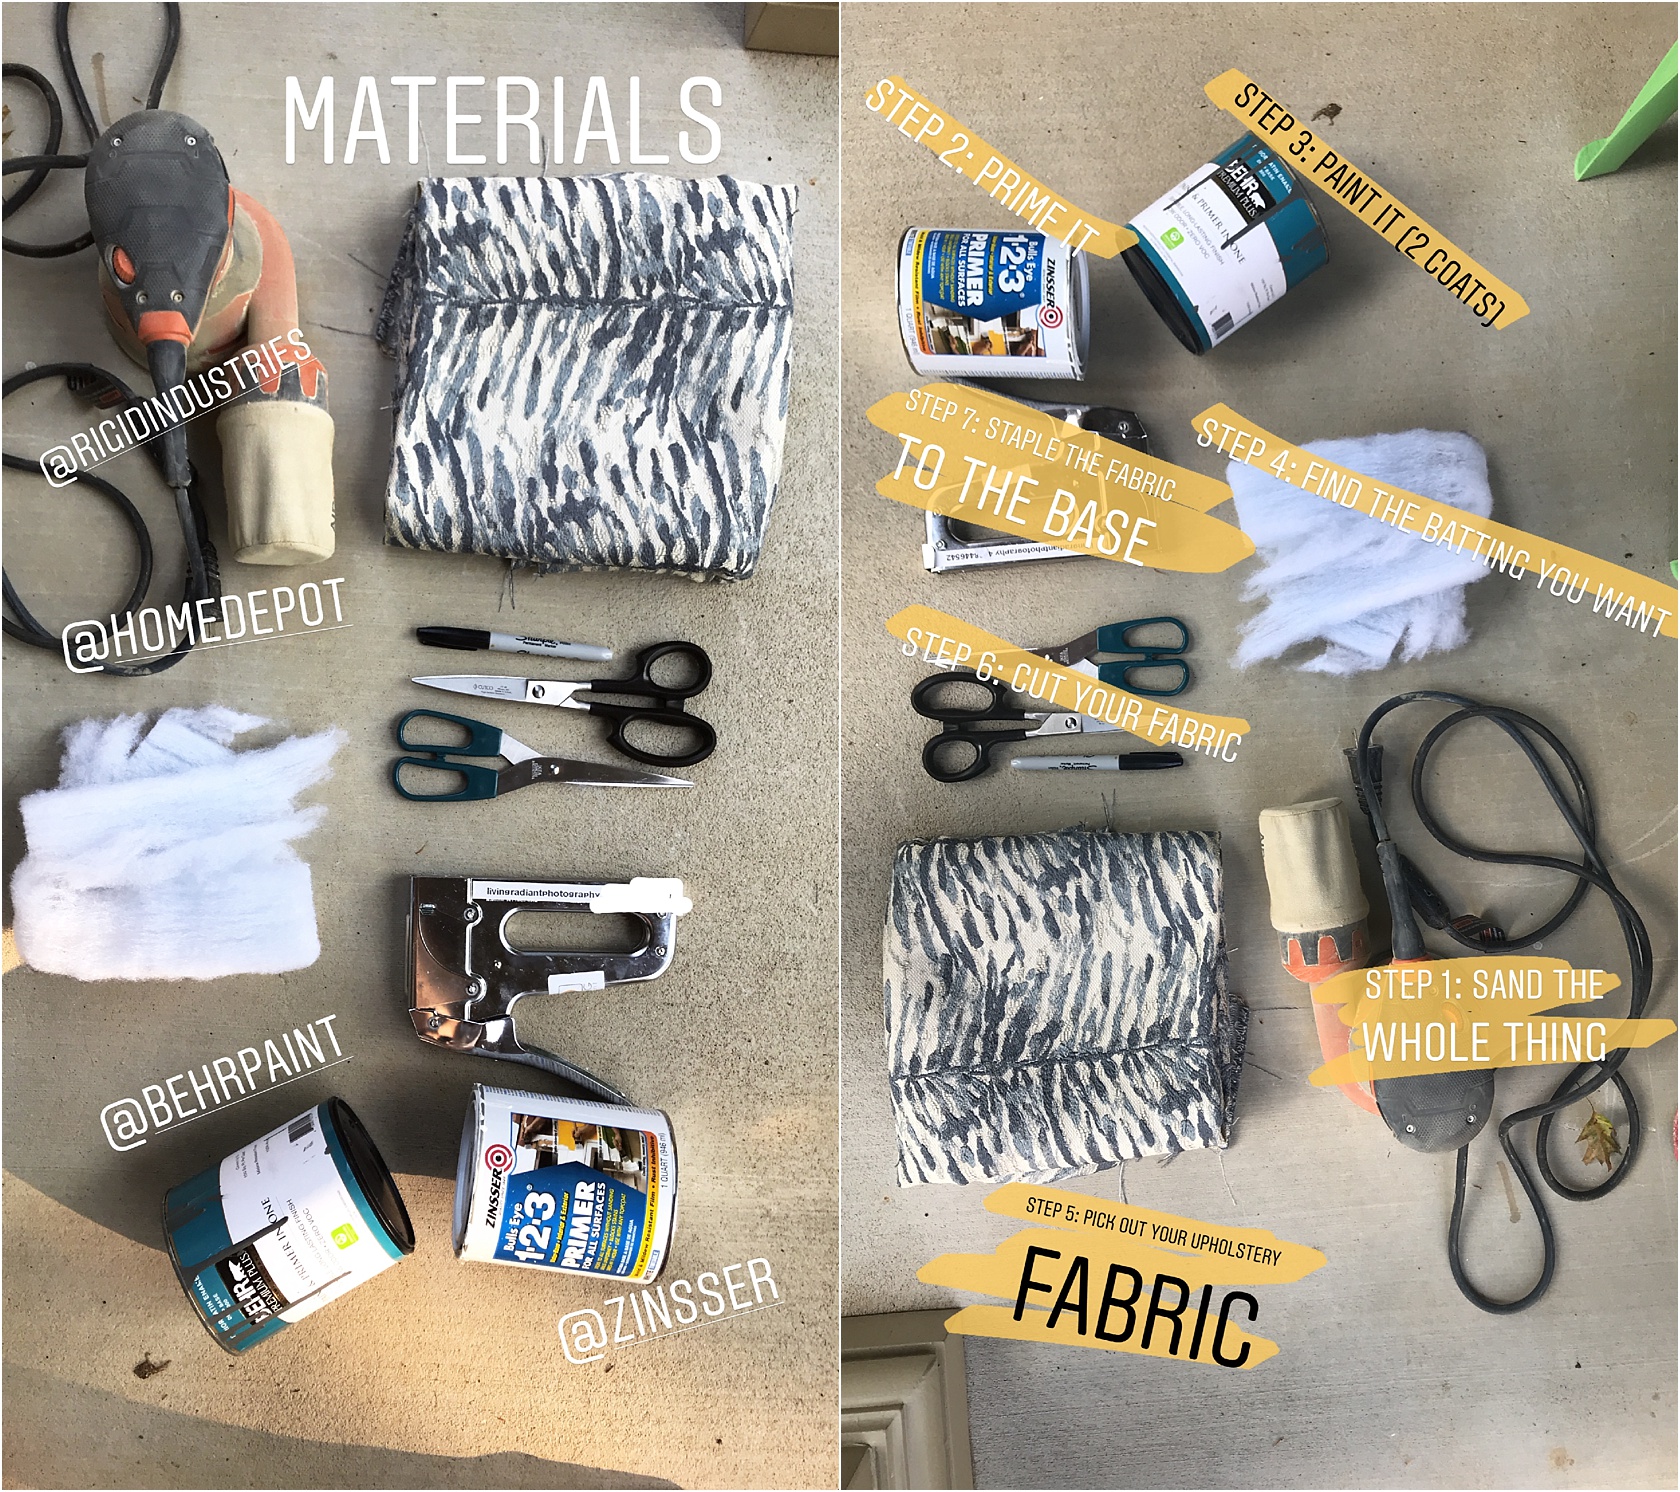
I gathered all the materials to make sure that I had what I really wanted and kept moving. Here’s a materials list for you guys. Also, here’s a few items that are MUST HAVES too!
Materials:
- Furniture
- Hand Sander Electric + Sanding Block
- Primer
- Paint Color of your Choice (make sure to get the right finish you want)
- Hardware if you want to swap out the original or what came with the piece
- Brasso if you want to polish the Brass and use original hardware
- Batting for New Cushion
- Upholstery Fabric (most are sold by the yard, I only bought 3/4 of a yard and even have over half left over)
- Staple Gun
- Scissors
- Sharpie
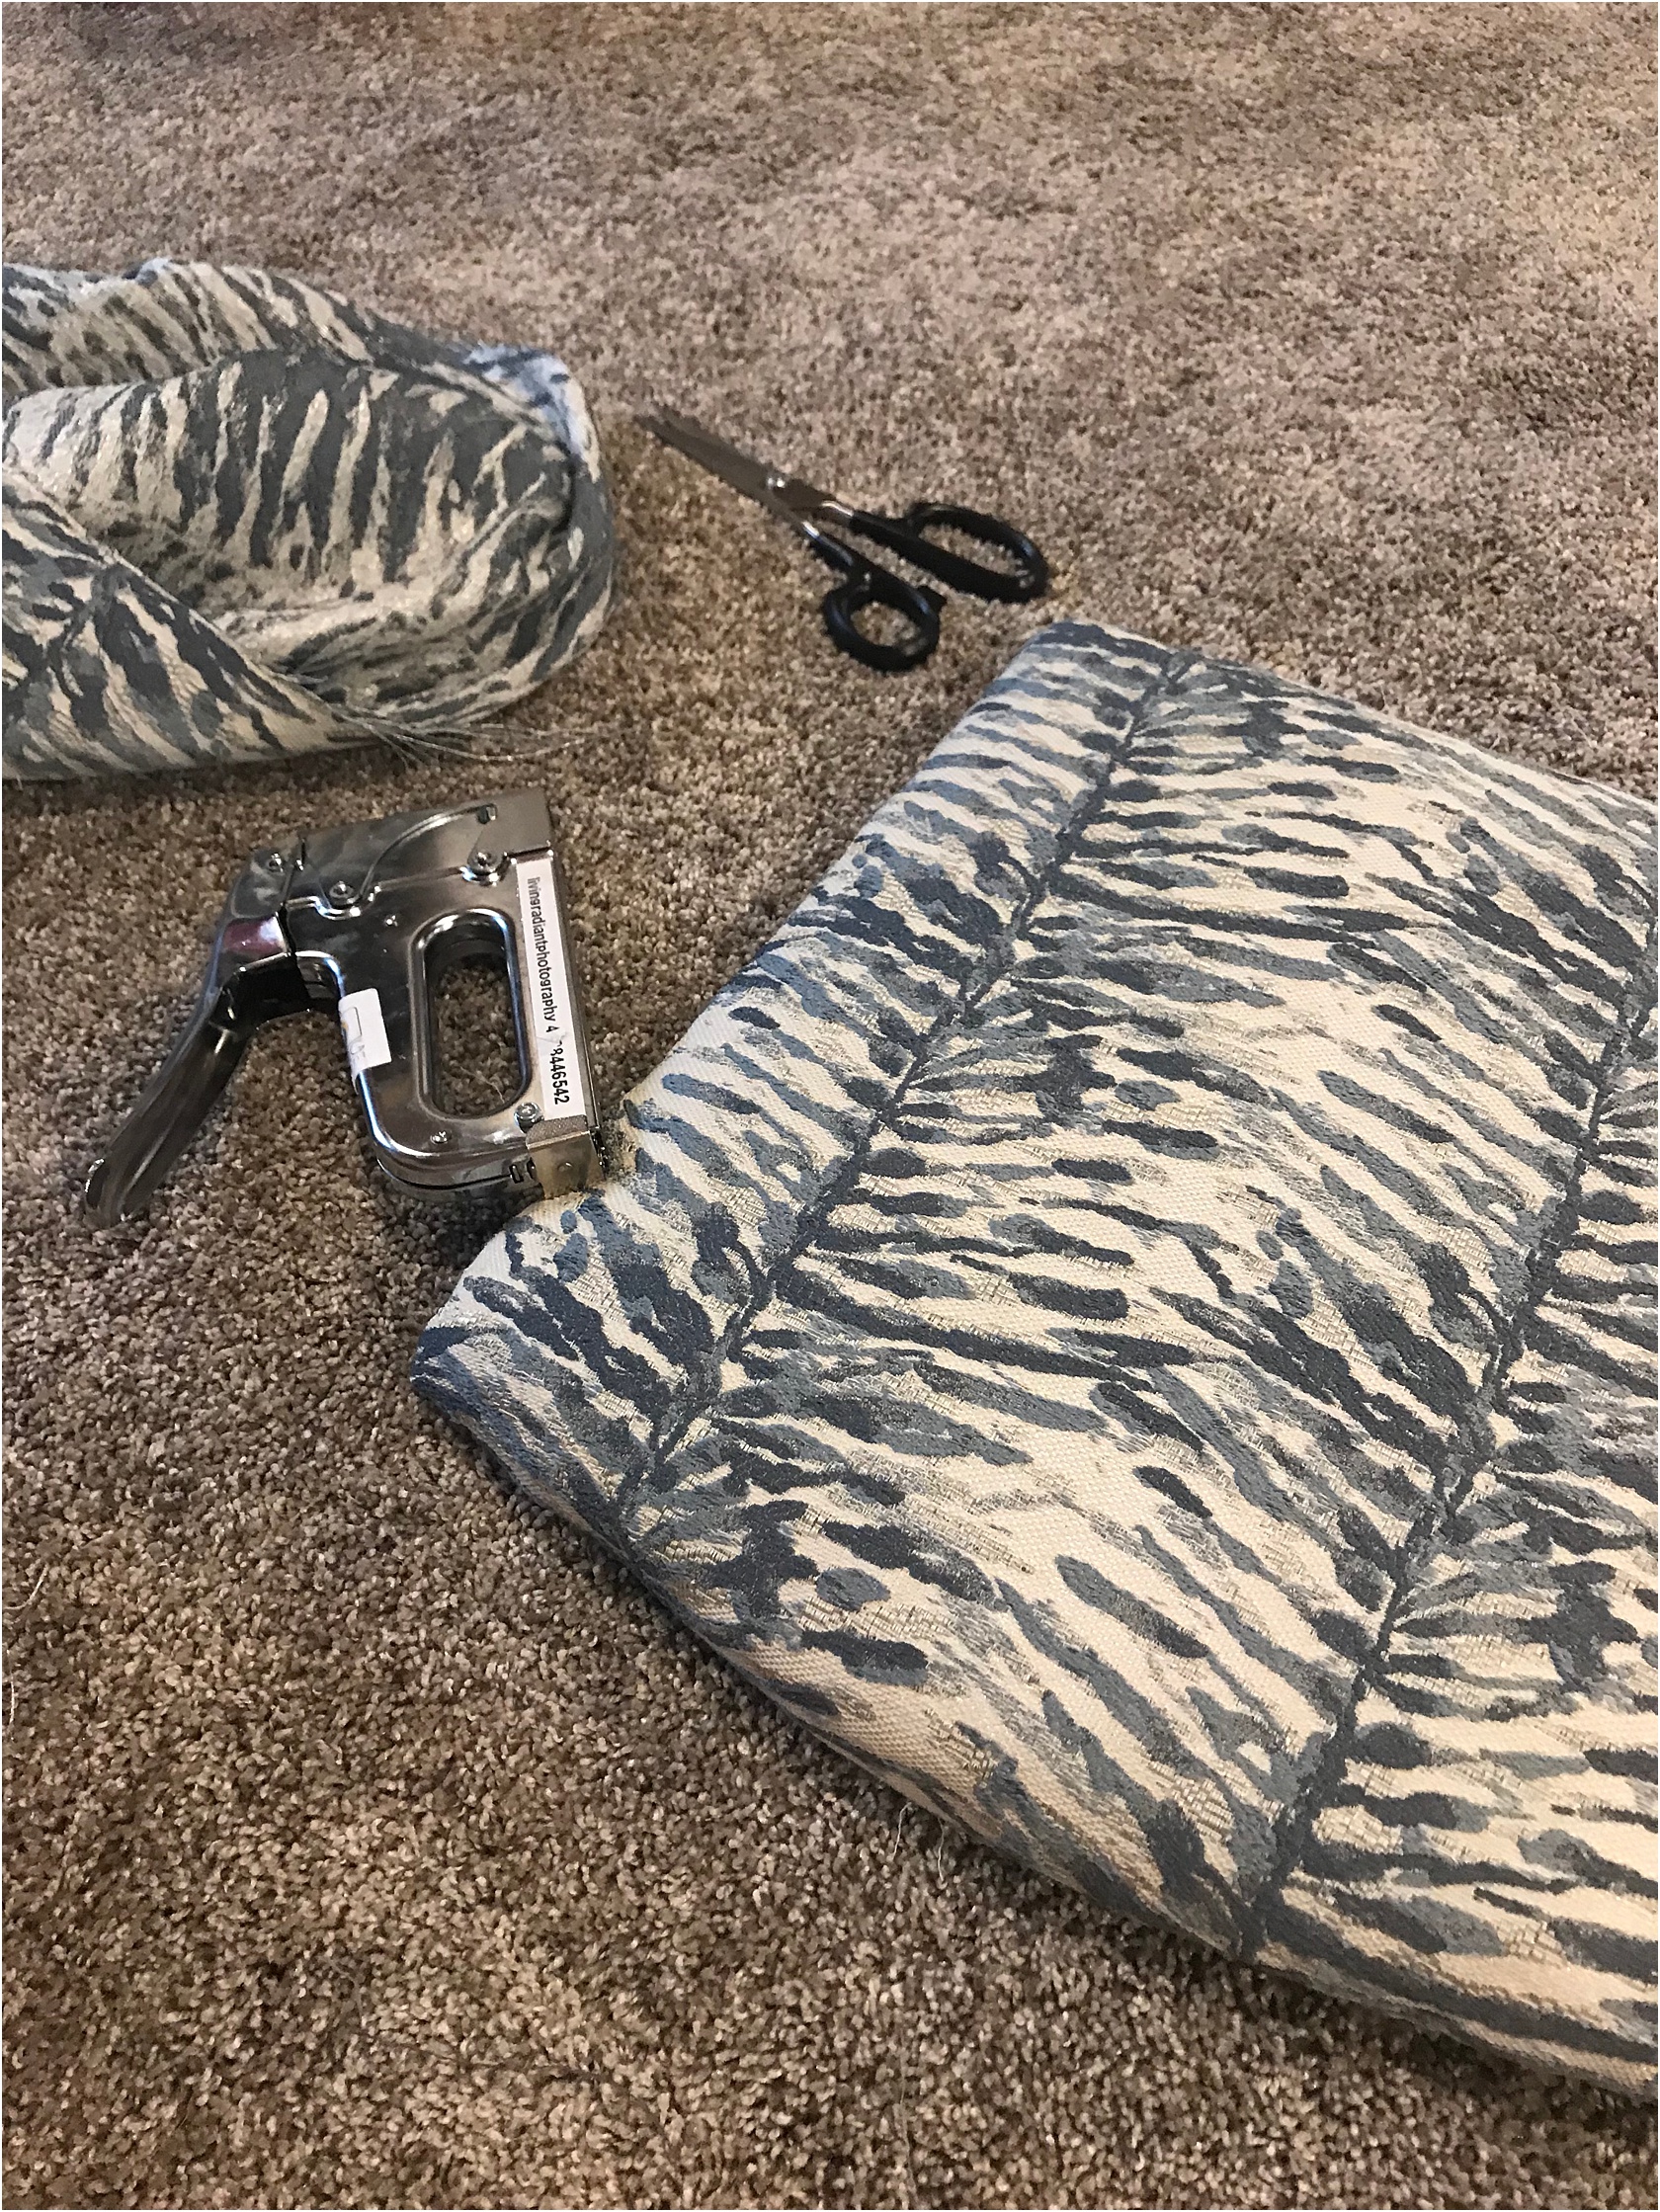
When I returned home, I put Zeke down for a nap and got to work on the seat. I needed the wood base for the batting and the fabric. Before stapling or cutting anything be sure to position the fabric where you want so the design on the cushion is exactly what you want. Once you have it, you cut the fabric with enough to wrap around the back of the base, giving yourself about 1-2 inches so you can staple the fabric to the base. Once that’s done, it’s time for assembly. Wala!
This is the finished chair. I am missing the gold Rubn’Buff on the flowers. Waiting for Amazon to drop it on my front porch and then it will really be done. But this still is awesome. I then took it up next to the desk and I am SO thrilled with how it all turned out!


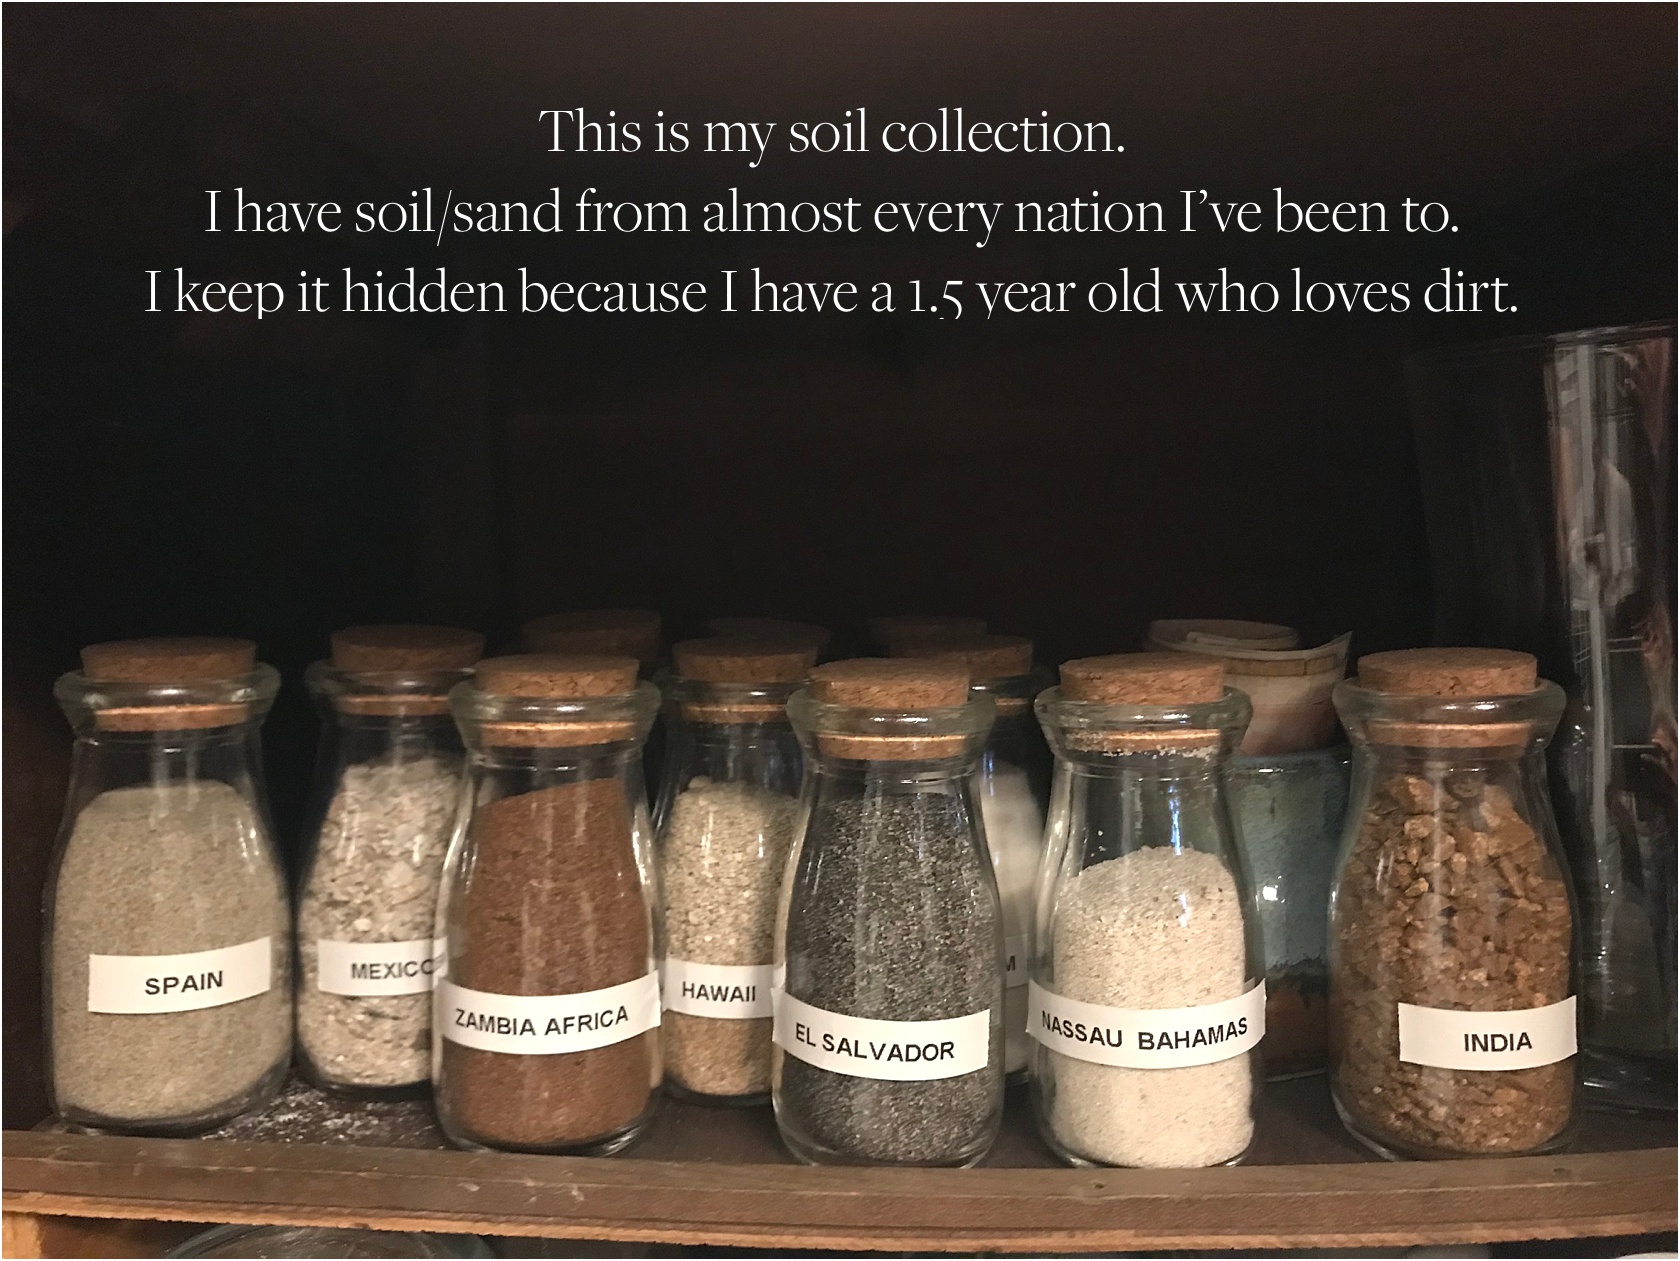
Super fun fact, I collect dirt and spoons. But really, I have the soil in containers from almost every nation my feet have touched, and I have spoons from every place and state I’ve been on the planet (not shown). That’s another whole project.
I really hope you guys liked this Travel Inspired Desk and Chair Makeover. It’s been a really long time since I’ve done a personal project on our website. We have such a crazy wild and amazing life and I’m always focusing on everyone else that I forget sometimes to do the things that I really LOVE to do that don’t involve a camera (well I did take these AFTER photos with the same camera and lens I use to shoot my invitations and newlywed photos).


+ COMMENTS
add a comment